Vacuum cleaner has jobs to be done

After I gained root access to my vacuum cleaner robot, a new world of opportunities emerges. This is the great aspect of owning your own home devices. And it is geometric. After you add a new liberated device to your home mesh, you can start thinking on all the combinations among your other devices, even if they won’t make any sense. Vacuum cleaner + thermostat? So you clean the room when it reaches some temperature? It doesn’t seem to go anywhere. Vacuum cleaner + roller shutters, so you clean after you close them? Neither it does. Vacuum cleaner + mobile presence? Hmm.. that might make sense!

But beyond the solutions looking for a problem, I am really committed to find real, practical use cases. And I found 2 great cases for squeezing the new liberated capabilities:

  • Starting house cleanup after we leave the house. It takes some time for the robot to clean the house. And you want it to do it while you are not at home. But not every time you leave, it depends on the last time you cleaned it, how long you are going to be out… So you want to tell the robot, Hey! We are leaving the house shortly! When we leave, start cleaning the house!
  • Choosing what rooms to clean. This fits in my house cleaning routine, usually on the weekend. I start organizing rooms, making the beds, cleaning the dust… After I finish one room, I want to send the robot to that room. If I finish the next room, I want to queue it after the other. This capability is not available in the robot nor in the app. You can tell the robot to clean several rooms at once, but not queuing rooms on the fly

Controlling the robot

After you root the robot, there are several alternatives to control it:

  • python-miio. A command line tool for communicating with Xiaomi devices. It supports many different gadgets, from light bulbs to air purifiers, and vacuum cleaners. You need to get an authentication token, which can be be obtained from the robot if you have rooted it, or from the android app. In the case of It doesn’t work very well with the Viomi V7, since it doesn’t get track of the sequence id. You need to reboot the robot to use the command line tool again
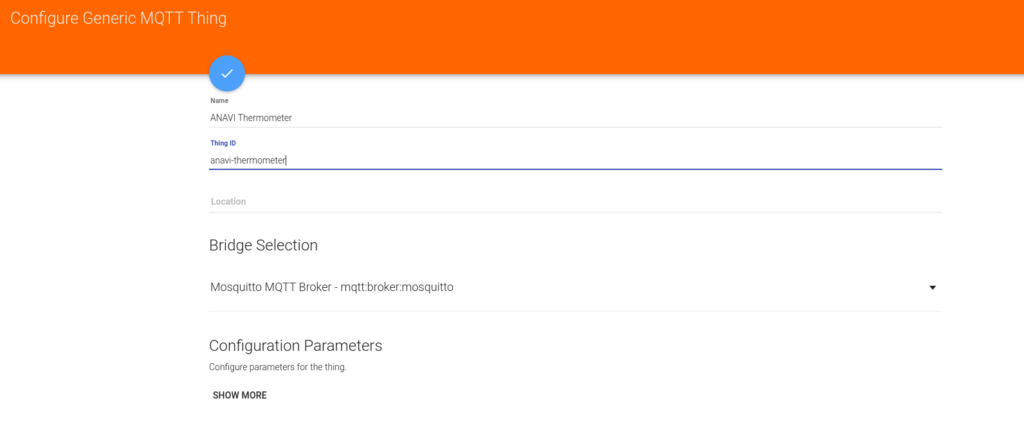
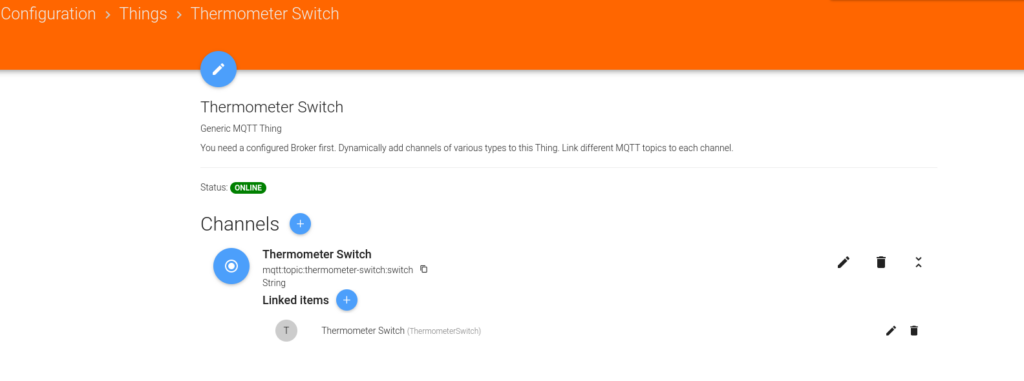
  • OpenHAB Xiaomi Mi IO Binding There is one Xiaomi addon for OpenHAB, which works pretty well. It also needs the authentication token to communicate with the robot. The basic commands are already available, and you can always send custom commands, which people have extracted from the binaries. The problem with this option is the robot state availability. It does not work in a push way, from the robot to OpenHAB. You need to configure the interval in which OpenHAB will ask to robot, and will update the OpenHAB things with the new values. This is not very practical to implement real time things, like updating cleaning rooms queue.
  • Valetudo Valetudo provides 2 more ways to communicate with the robot
    • REST API. Valetudo exposes a complete Swagger enabled API documented API with all the capabilities of the robot
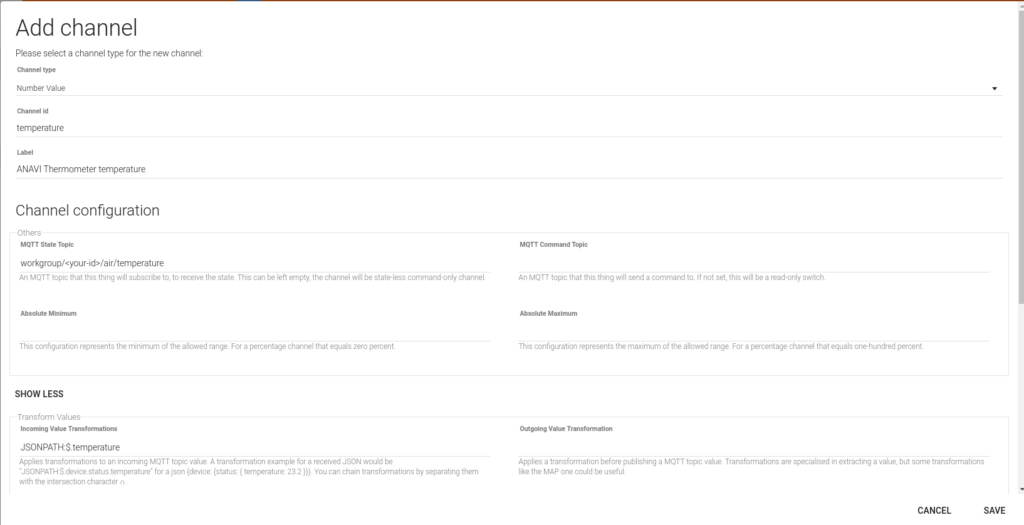
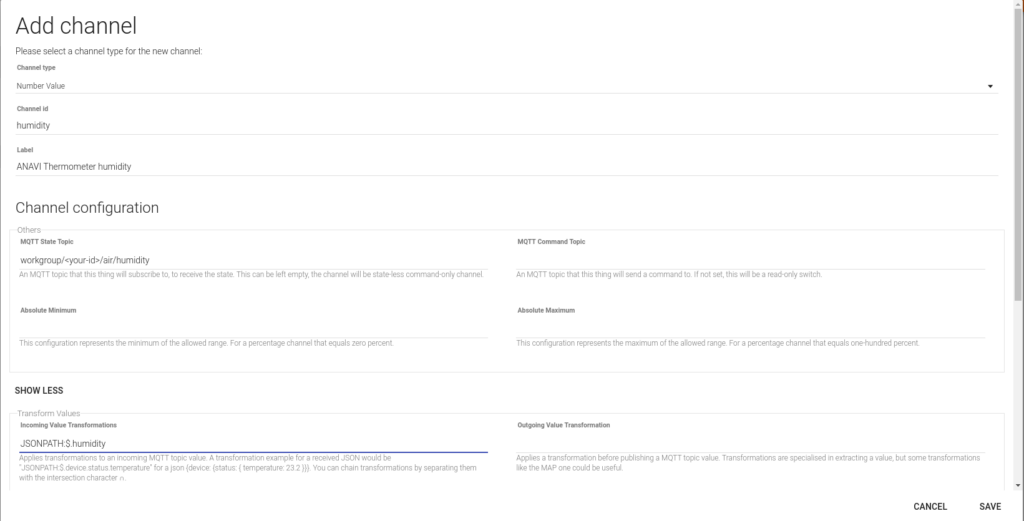
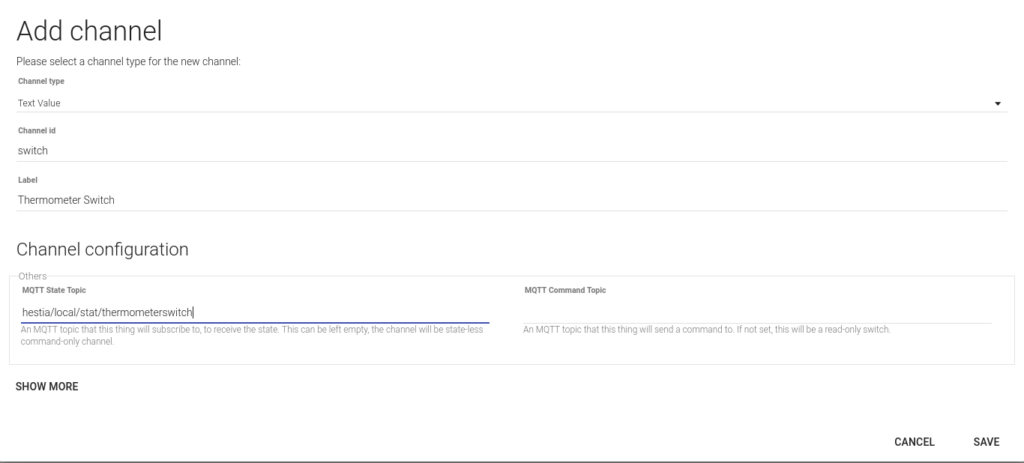
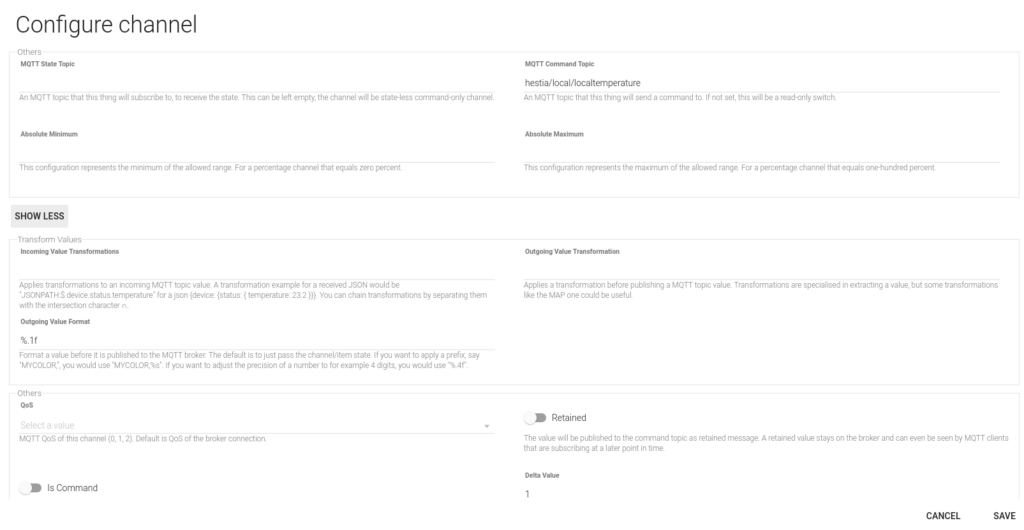
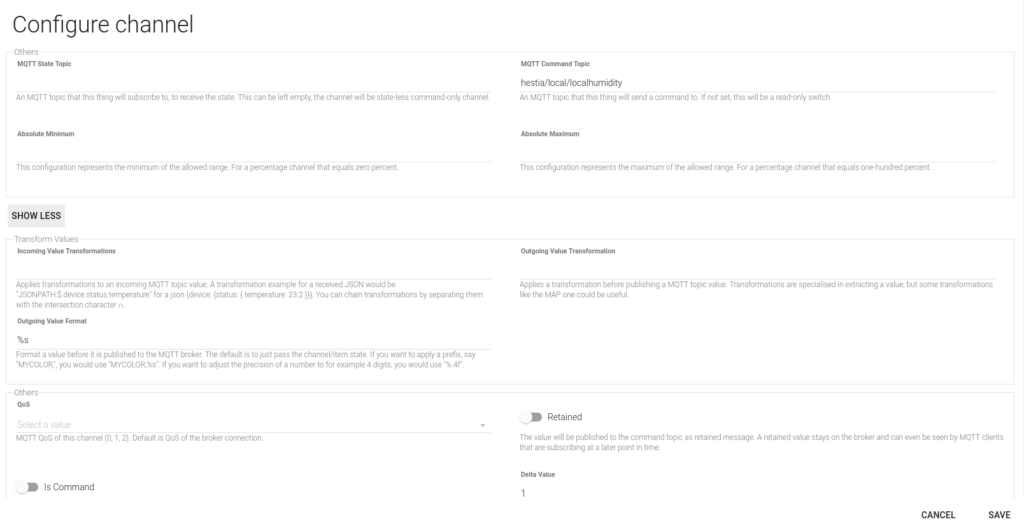
    • MQTT You can also configure a MQTT server, and Valuetudo will publish all the robot information to the MQTT server. It will also listen for commands. This is great for push notifications, you can subscribe to MQTT topics, instead of pulling the information from the robot. Valetudo will publish robot states in real time

Implementation

With these tools, I implemented the 2 functionalities I described before in my kitchen dashboard

Cleanup after we leave the house

I added a new button in the dashboard. When you push it, it just publishes a true value on a MQTT topic. A rule in OpenHAB will check this value when our presence group turns off. That is, we left the house. If this value is set, it will tell the the robot to start cleaning the house

rule "start when leaving"
when
  Item our_presence changed to OFF
then
  if (robotito_start_when_leaving.state == ON) {
    robotito_commands.sendCommand("set_mode_withroom [0, 1, 0]")
    robotito_start_when_leaving.sendCommand(OFF)
  }
end

House map

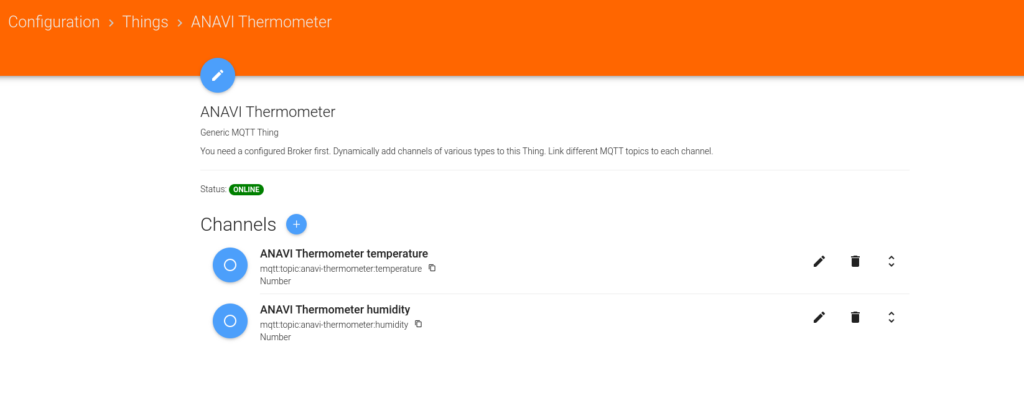
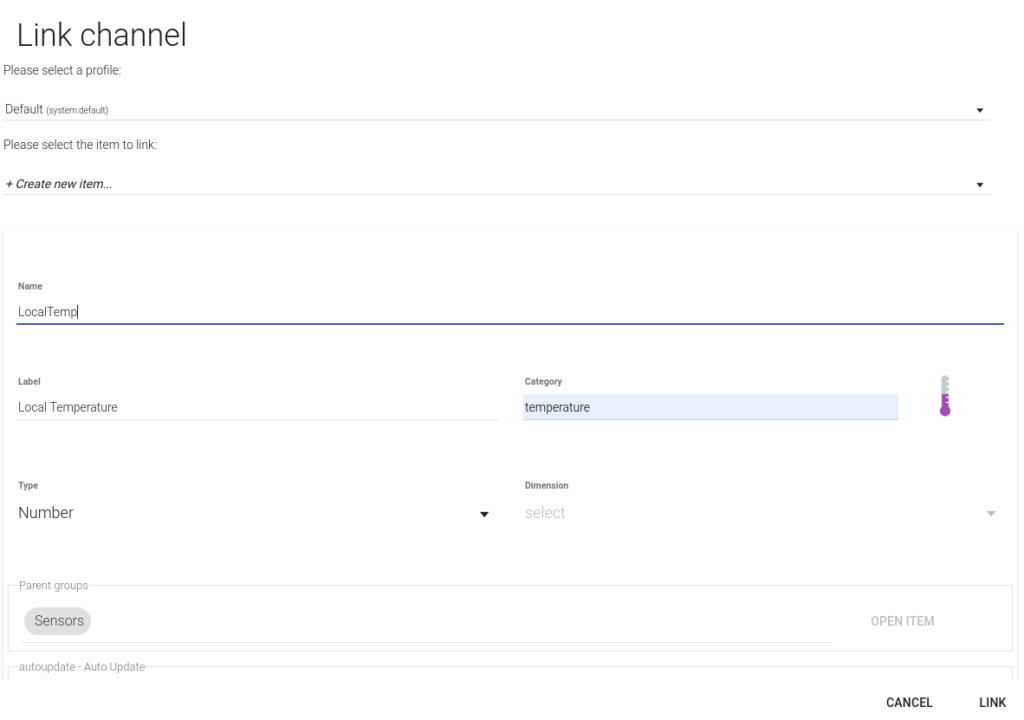
I implemented a map of my house in the kitchen dashboard. This way, I can just touch the rooms in the map to send the robot to clean them. There is a MQTT channel for this, pending_rooms, where a comma-separated list of rooms ids gathers the rooms that need to be cleaned

A set of rules in OpenHAB watches for the changes in both, the robot state (via Valetudo MQTT) and the pending_rooms channel. The set of rules allows to enqueue rooms, remove rooms in the middle of the clean, or canceling and send the robot to the dock.

In order to build the set of rooms, I needed to draw the states of the robot. This was very useful to program the rules later

Flowchart after 
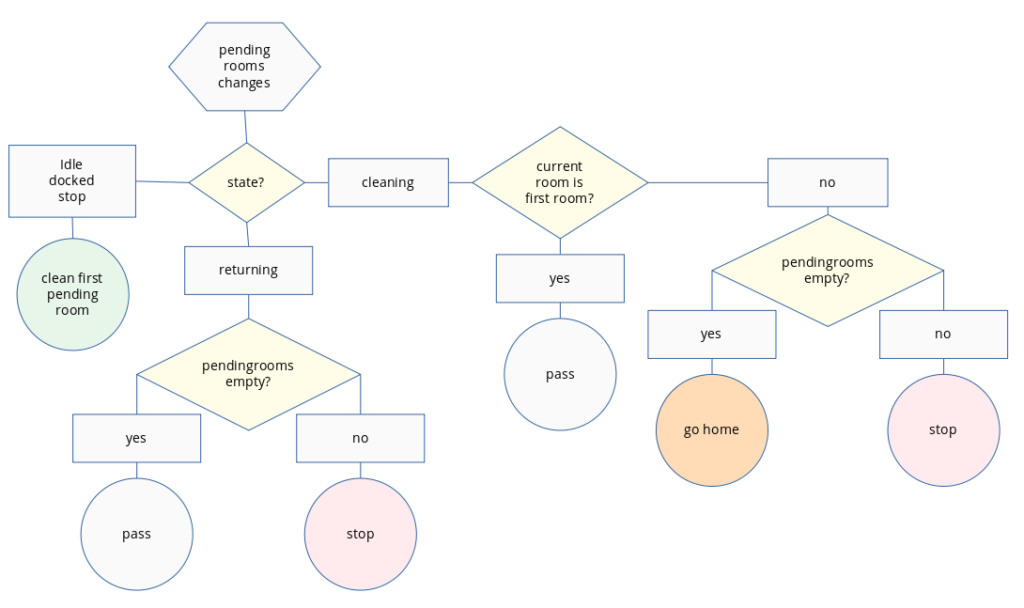
pending_rooms changes
Flowchart after robot state changes

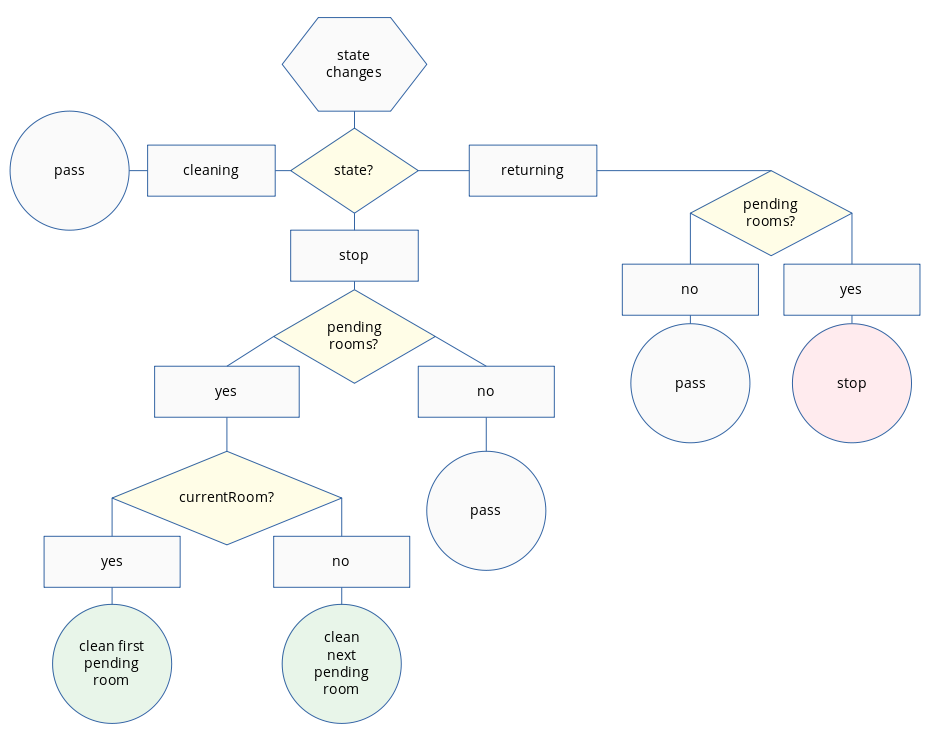
I programmed the rules using the native OpenHAB rules DSL. It is based in Xtend. It was a real mess to program the rules. I hate Xtend. I find it a real nightmare. It is very limited. It took me several hours just to figure out how to do an Array unshift. I tried to install JS or Python rules engines, but it required to many additional steps

Anyway, I manage to get the functionality with the following rules file

// Commands
var stop = "set_mode [0]"
var home = "set_charge [1]"

var currentRoom = ''
var willClean = false

rule "pendingrooms changed"
when
  Item robotito_pendingrooms changed
then
  var rooms = robotito_pendingrooms.state.toString
  logError("robotito", "robotito_pendingrooms changed to: " + rooms)
  var state = valetudo_robotito_status.state.toString

  if (state == "returning") {
    if (rooms == "") {
      logError("robotito", "state is returning and no pending rooms. pass")
    } else {
      logError("robotito", "state is returning and there are pending rooms. stopping")

      robotito_commands.sendCommand(stop)
    }
    
    return;
  }

  if (state == "idle" || state == "docked" || state == "stop") {
    if (rooms == "") {
      logError("robotito", "rooms are empty. pass")

      return;
    }
    
    var firstRoom = rooms.split(",").get(0)

    logError("robotito", "state was: " + state + ". cleaning first pending room: " + firstRoom)

    currentRoom = firstRoom
    
    robotito_commands.sendCommand("set_mode_withroom [0, 1, 1, " + currentRoom + "]")

    return;
  }

  if (state == "cleaning") {
    var list = rooms.split(",")
    var firstRoom = list.get(0)

    if (firstRoom == currentRoom) {
      logError("robotito", "state was cleaning and firstRoom is currentRoom: " + currentRoom + ". pass")
      return;
    }

    if (rooms == "") {
      logError("robotito", "state was cleaning and firstRoom is empty. sending home")

      currentRoom = ""

      robotito_commands.sendCommand(home)
    } else {
      logError("robotito", "state was cleaning and firstRoom is not empty nor currentRoom. stopping to change room")

      currentRoom = ""

      robotito_commands.sendCommand(stop)
    }
   return;
  }

  logError("robotito", "unknown robotito state: " + state)
end

rule "state changed"
when
  Item valetudo_robotito_status changed
then
  var state = valetudo_robotito_status.state.toString
  var rooms = robotito_pendingrooms.state.toString

  logError("smarthome.event", "robotito state changed to " + state)


  if (state == "cleaning") {
    willClean = false
    logError("robotito", "robotito state changed to cleaning. pass")
   
    return;
  }

  if (state == "returning") {
    if (willClean) {
      logError("robotito", "state changed to returning, but will clean. pass")
      willClean = false
      return;
    }

    if (rooms == "") {
      logError("robotito", "robotito state changed to returning, and no rooms pending. pass")
      
      return;
    }

    if (rooms.split(",").size() < 2) {
      logError("robotito", "robotito state changed to returning, and room " + rooms + " was just cleaned. reseting pending rooms and pass")

      currentRoom = ""
      robotito_pendingrooms.sendCommand("")

      return;
    }

    logError("robotito", "robotito state changed to returning, and there are pending rooms: " + rooms + " stopping")

    robotito_commands.sendCommand(stop)
  
    return;
  }

  if (state == "idle") {
    if (rooms == "") {
      logError("robotito", "robotito state changed to idle, and no rooms pending. pass")
    } else {
      willClean = true
      logError("robotito", "willClean set to true")

      if (currentRoom == "") {
        var firstRoom = rooms.split(",").get(0)

        logError("robotito", "state was idle, but currentRoom was empty. start cleaning first pending room: " + firstRoom)

        currentRoom = firstRoom
    
        robotito_commands.sendCommand("set_mode_withroom [0, 1, 1, " + currentRoom + "]")
      } else {
        logError("robotito", "robotito state changed to idle, there was currentRoom: " + currentRoom + " and there are pending rooms: " + rooms + ". jumping to next room")
        var list = rooms.split(",")
        var newPendingRooms = ""
        for (var i = 1; i < list.size(); i++) {
          newPendingRooms = newPendingRooms + list.get(i)

          logError("robotito", "i: " + i)
          logError("robotito", "setting newPendingRooms: " + newPendingRooms)
          if (i != list.size() - 1) {
            newPendingRooms = newPendingRooms + ","
          }
        }
  
        robotito_pendingrooms.sendCommand(newPendingRooms)
      }
    }

    return;
  }

  logError("robotito", "robotito state changed to " + state + ". not addressed")
end

These two functionalities are pretty handy and show up the benefits of controlling your things. Besides the peace of knowing what it is going on inside your own devices.

Visualizing temperatures and heating cycles

During these last days, the weather went crazy in Madrid. A great snowstorm was followed by a great freeze. It was hard for our heater to catch up. But also, a perfect scenario for learning more about what is going on with temperatures inside and outside the house!

Since the beginning, when I started with home automation and my thermostat, I had it clear that I wanted to store the data and get insights from it.

Besides, I could read about rlkoshak‘s great graphics in his How to customize a Rule tutorial, I had the way forward. In fact, rlkoshak pointed to a Grafana + InfluxDB tutorial, which I used as reference. In any case, I found some issues I wanted to share.

InfluxDB as OpenHAB persistence

InfluxDB is an opensource time series database. I found that configuring OpenHAB for storing item values is pretty straightforward!

First, you need to install the InfluxDB extension

Then, you just have to add one file to the /etc/openhab2/persistence/influxdb.persist with the items you want to store, and its frequency. For instance, I stored the items related with house temperatures, the heater working, and the thermostat temperature setpoint.

Strategies {
  everyMinute : "0 * * * * ?"
  everyHour : "0 0 * * * ?"
  everyDay : "0 0 0 * * ?"
}
Items {
  HeatingState, Temperature, OutsideTemperature, Humidity, OutsideHumidity, TemperatureSetpoint : strategy = everyChange, everyHour
}

Finally, you should define the users for database access. Besides the admin user, with full privileges, you should add a read write user for OpenHAB and a read only user for Grafana. All this setup is covered in the tutorial.

Grafana graphics

The next step, which is also covered in the tutorial, is about connecting Grafana with InfluxDB. You must use datasources for that. Then you can start building graphics.

However, I had a major problem: I wanted a graphic with temperatures and heating state, but InfluxQL, the default query language, does not support value conversion. I needed the HeatingState value to be mapped from ON / OFF to 1 / 0, so it could be drawn with the temperatures.

I could achieve this creating a new number item in OpenHAB. But I though it was not OpenHAB’s responsibility to change the way it stores the data, but Grafana‘s to convert the data so it is able to draw it.

So I adopted the Flux approach: besides InfluxQL, InfluxDB supports a more advanced language that can be used to query the database and prepare the data, supporting data transformations.

Flux plugin is already distributed with Grafana, but I needed to upgrade InfluxDB to 1.8, where the Flux API is supported.

Organizations and tokens are a bit misleading as well. You don’t need an organization at all, and the token is the form user:password. Totally unexpected.

With this configuration, I could build a Flux query where I could transform the string values ON / OFF into integers. It also transforms the fields names for a better label in the graph, and groups the values by time intervals.

from(bucket: v.defaultBucket)
  |> range(start: v.timeRangeStart, stop:v.timeRangeStop)
  |> filter(fn: (r) =>
    r._measurement == "HeatingState" and
    r._field == "value"
  )
  |> map(fn: (r) => ({r with _value:if r._value == "ON" then 1 else 0 }))
  |> fill(column: "_value", usePrevious: true)
  |> set(key: "_field", value: "")
  |> set(key: "_measurement", value: "Calefacción")

I used some more tweaks to draw the HeatingState in red as temperature background.

You can see the result! I was just in time to catch the greatest snowstorm in Madrid in the last 60 years, followed by the great freeze! You can see how outside temperatures established for two days during the snowfall, and then dropped to below zero. Luckily the temperatures inside our home stayed safe!

Temperatures before, during and after the great 2021 Madrid snowstorm

Open Bedroom Thermometer: Integration with the thermostat

My main goal of setting an extra thermometer in the bedroom was to integrate it with my open thermostat, placed in the living room. My house is not big, but when we go to bed, we are not in the living room anymore. We want it to watch for the temperature in our bedroom.

Of course, I wanted to automatize this switch as well. Every night, when we go to sleep, the thermostat switches the tracking of the temperatures from the living room thermometer, to the bedroom thermometer. When we wake up, it switches back to the living room thermometer, the one in the thermostat.

One of the great things about using open hardware and software is that you can customize everything. I could change and adapt both the UI and the logic of the thermostat to incorporate the new temperature readings

UI integration

HestiaPi UI is just Javascript (Vue.js) and HTML, running on Kweb, a very light browser for Raspberry Pi. I redesigned the interface to accommodate the new figures. I also added the buttons to switch manually the thermometer that drives the thermostat behavior, from the thermostat sensor to the bedroom thermometer and back. HestiaPi UI communicates over MQTT, the same way than ANAVI Thermometer, so it was pretty straightforward to copy the same logic.

You can find the code in the anavi-thermometer branch of my fork of hestia-touch-one-ui.

Modified interface of HestiaPi including ANAVI Thermometer readings

Backend integration

HestiaPi logic is built on top on OpenHAB. Despite OpenHAB is a bit heavy for running in a Raspberry Pi Zero, it provides HestiaPi with all the power of smart home capabilities.

Backend integration involves new OpenHAB things, channels, items and rules, so it deserves its own post: ANAVI Thermometer – HestiaPi integration

ANAVI Thermometer things and channels in Hestia Pi’s OpenHAB

I feel grateful for having found these two great open projects and being able to play with them, learn many things and having a feeling of accomplishment after customizing my own setup!

This is the last post on these ANAVI Thermometer series, but not the last from Hestia Pi… More hacking to come!

ANAVI Thermometer – HestiaPi integration

This integration works with HestiaPi Touch ONE v1.2

These changes need the HestiaPi Touch UI to be updated with my anavi-thermometer branch.

Add-ons

ANAVI Thermometer publishes values in JSON. They are easy parsed in OpenHAB with the JSONPath transformation add-on. We will need to install it first

Things and items

ANAVI Thermometer

We create a separate Generic MQTT Thing for setting the channels related to ANAVI Thermometer values

Generic MQTT Thing configuration

Then we create appropriate channels for ANAVI Thermometer’s temperature and humidity. They will probably be pushed to workgroup/<your id>/air/temperature and workgroup/<your id>/air/humidity MQTT paths. We use JSONPath for extracting actual values.

ANAVI Thermometer temperature channel
ANAVI Thermometer humidity channel
ANAVI Thermometer thing with channels

Finally, we need to link channels to their corresponding items. You can create them from the link channel, clicking at the arrows on the right

ANAVI Thermometer temperature item
ANAVI Thermometer humidity item

Thermometer Switch

We create an extra MQTT thing, Thermometer Switch, that will be used for selecting which temperature the thermostat is following; based on this thing, HestiaPi will act on changes of the temperature sensor from HestiaPi or the one from ANAVI Thermometer

Thermometer Switch thing

We need to create a new channel for this new thing. We will be reading its state from hestia/local/stat/thermometerswitch MQTT topic

Thermometer Switch channel

And finally, we create an item for this channel

Thermometer Switch channel with its linked item

Hestia Local Sensor Readings

A side effect of the Process Sensor Changes rule modification below is that the original MQTT channels used by HestiaPi to publish local sensor readings hestia/local/temperature and hestia/local/humidity will now publish ANAVI’s readings when Thermometer Switch has Anavi value. We will need to add two extra MQTT things and items to keep those local sensor readings. Former channels become current values the thermostat is considering for taking the decisions about turning on or off.

We add LocalTemp and LocalHumi MQTT channels pointing to hestia/local/localtemperature and hestia/local/localhumidity

LocalTemp channel
LocalHumi channel

And we link these things to their corresponding items LocalTemp and LocalHumi

LocalTemp item
LocalHumi items

Rules

Initialization rule

We will need to add the initial value for Thermometer Switch, that will default to HestiaPi’s value My. This value is not very descriptive, but will match HestiaPi’s item names and will make things easier in the rules below.

initState("ThermometerSwitch", "My");

Process Sensor Changes rule

Process Sensor Changes is the rule that updates temperature, humidity and pressure proxies. It also decides whether to update temperature based on hysteresis changes.

We add two new triggers so the rule is ran also whether AnaviTemp or AnaviHumi change

AnaviTemp trigger for Process Sensor Changes rule
AnaviHumi trigger for Process Sensor Changes rule

However, we need an extra condition: we set the constraint that the sensor that changed has to match the value of ThermometerSwitch, that is, only update values from HestiaPi’s sensor when My is selected in ThermometerSwitch, and only update values from ANAVI’s sensors when Anavi is selected

event.itemName.indexOf(items["ThermometerSwitch"]) == 0 || event.itemName == "MyPressure"

Finally, we slightly modify the rule to get the value from the relevant sensor, that can have My or Anavi prefix now

var OPENHAB_CONF = Java.type('java.lang.System').getenv('OPENHAB_CONF');
load(OPENHAB_CONF + '/automation/lib/hestia/utils.js');
load(OPENHAB_CONF + '/automation/lib/hestia/defaults.js');

var device;
var logName = "sensor";

logDebug(logName, "Changed "+event.itemName);

if (event.itemName == 'MyPressure') {
  device = 'Pressure'
} else {
  device = event.itemName.replace(items["ThermometerSwitch"], "");
}

// Update the proxy
events.sendCommand("My"+device+"Proxy", newState);

// Verifying the newState can be parsed is already checked in the but only if…
var newReading = parseFloat(newState.toString());

var prev = items["Previous"+device+"Reading"].floatValue();
if(prev == NaN) prev = 0;

var hyst = (device == "Temp") ? DEFAULTS.get("Temp"+items["TempUnit"]+"_DIFF") : DEFAULTS.get(device+"_DIFF");

logDebug(logName, "Processing " + device + " with value " + newState + " and prevState " + prev + " and delta " + delta);

var delta = Math.abs(newReading - prev);
if(delta > hyst) {
  logDebug(logName, "Updating Previous"+device+"Reading with " + newState);
  events.postUpdate("Previous"+device+"Reading", newState);
}
else {
  logDebug(logName, "Ignoring " + device + " sensor reading, change is too small");
}
Modified Process Sensor Changes rule

Process Local Sensor Changes rule

Finally, we add an extra rule to publish HestiaPi’s sensor values to the extra MQTT things LocalTemp and LocalHumi that we created before

They will be triggered when MyTemp or MyHumi change

var OPENHAB_CONF = Java.type('java.lang.System').getenv('OPENHAB_CONF');
load(OPENHAB_CONF + '/automation/lib/hestia/utils.js');
load(OPENHAB_CONF + '/automation/lib/hestia/defaults.js');

var logName = "localsensor";

logDebug(logName, "Changed "+event.itemName);

var device = event.itemName.replace("My", "");

// Update the proxy
events.sendCommand("Local"+device, newState);