Open Bedroom Thermometer: Integration with the thermostat

My main goal of setting an extra thermometer in the bedroom was to integrate it with my open thermostat, placed in the living room. My house is not big, but when we go to bed, we are not in the living room anymore. We want it to watch for the temperature in our bedroom.

Of course, I wanted to automatize this switch as well. Every night, when we go to sleep, the thermostat switches the tracking of the temperatures from the living room thermometer, to the bedroom thermometer. When we wake up, it switches back to the living room thermometer, the one in the thermostat.

One of the great things about using open hardware and software is that you can customize everything. I could change and adapt both the UI and the logic of the thermostat to incorporate the new temperature readings

UI integration

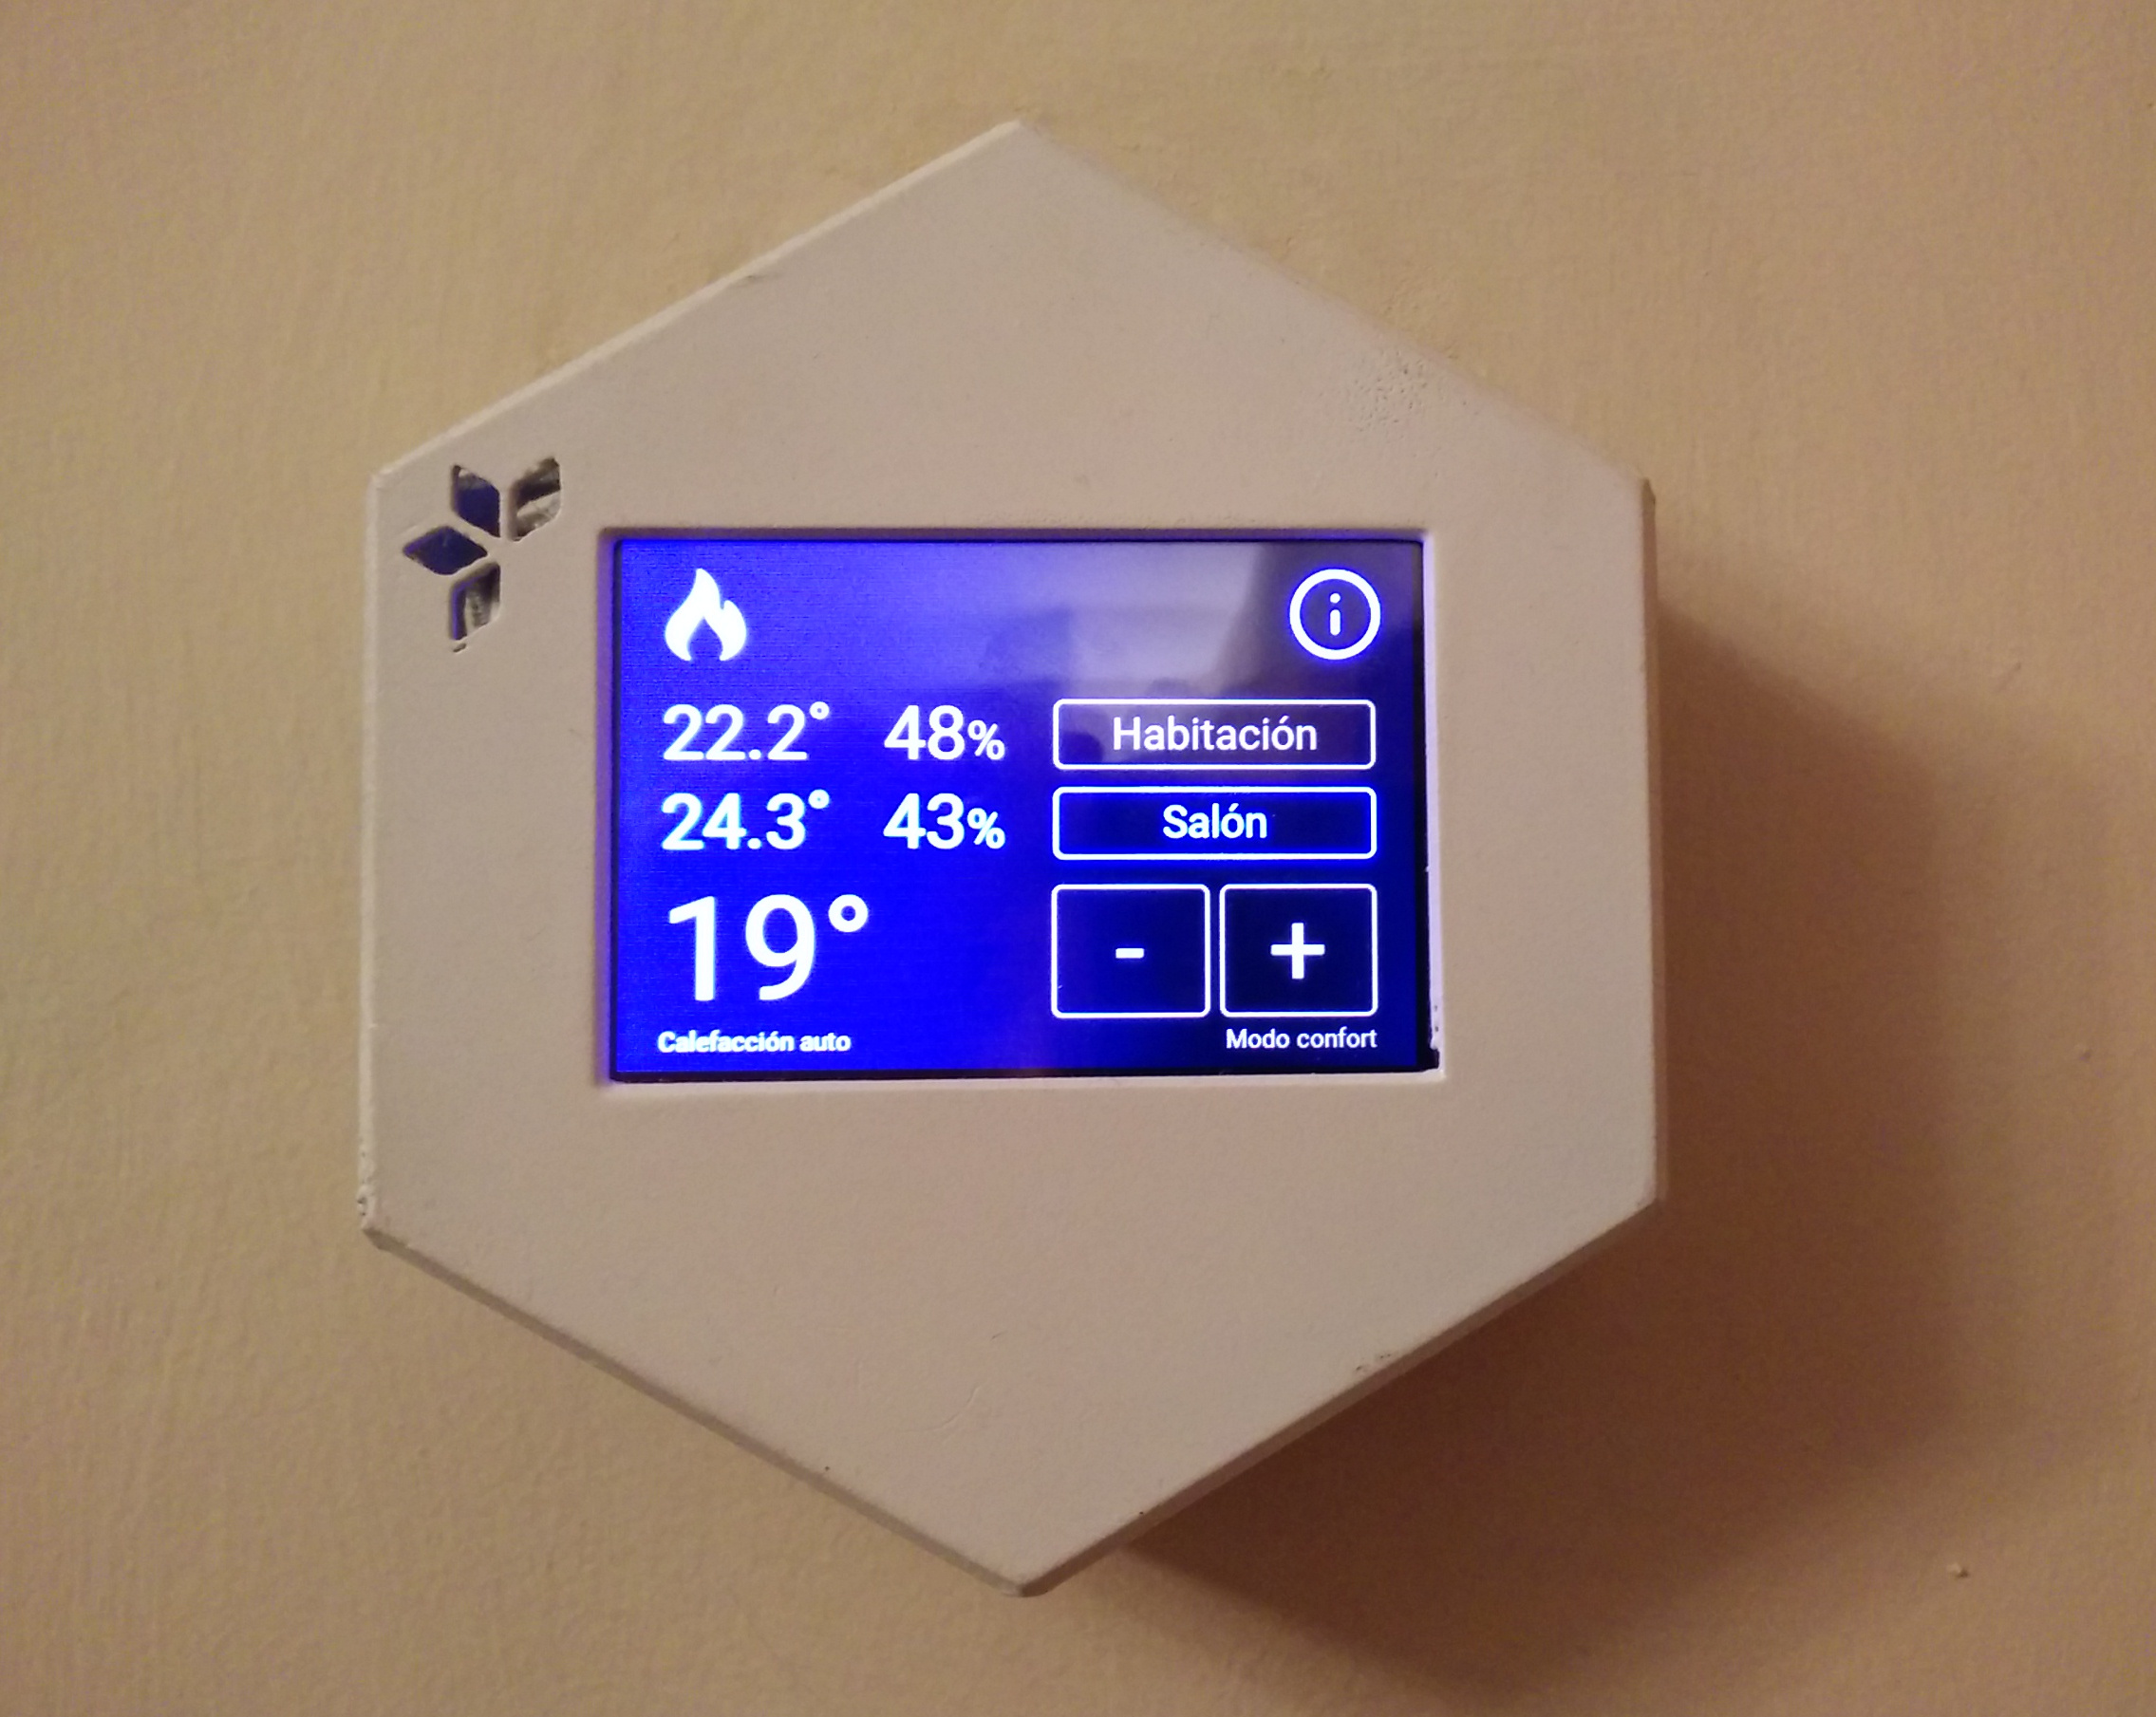
HestiaPi UI is just Javascript (Vue.js) and HTML, running on Kweb, a very light browser for Raspberry Pi. I redesigned the interface to accommodate the new figures. I also added the buttons to switch manually the thermometer that drives the thermostat behavior, from the thermostat sensor to the bedroom thermometer and back. HestiaPi UI communicates over MQTT, the same way than ANAVI Thermometer, so it was pretty straightforward to copy the same logic.

You can find the code in the anavi-thermometer branch of my fork of hestia-touch-one-ui.
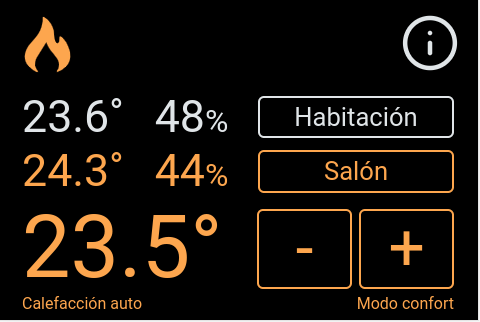
Modified interface of HestiaPi including ANAVI Thermometer readings

Backend integration

HestiaPi logic is built on top on OpenHAB. Despite OpenHAB is a bit heavy for running in a Raspberry Pi Zero, it provides HestiaPi with all the power of smart home capabilities.

Backend integration involves new OpenHAB things, channels, items and rules, so it deserves its own post: ANAVI Thermometer – HestiaPi integration
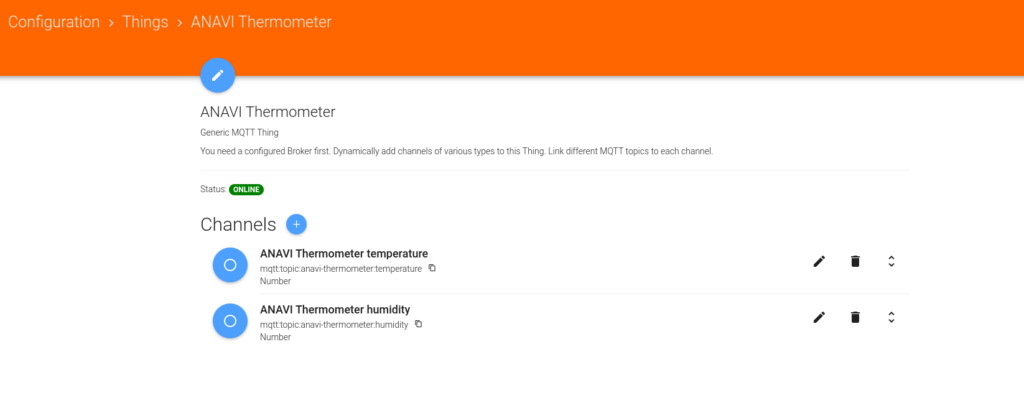
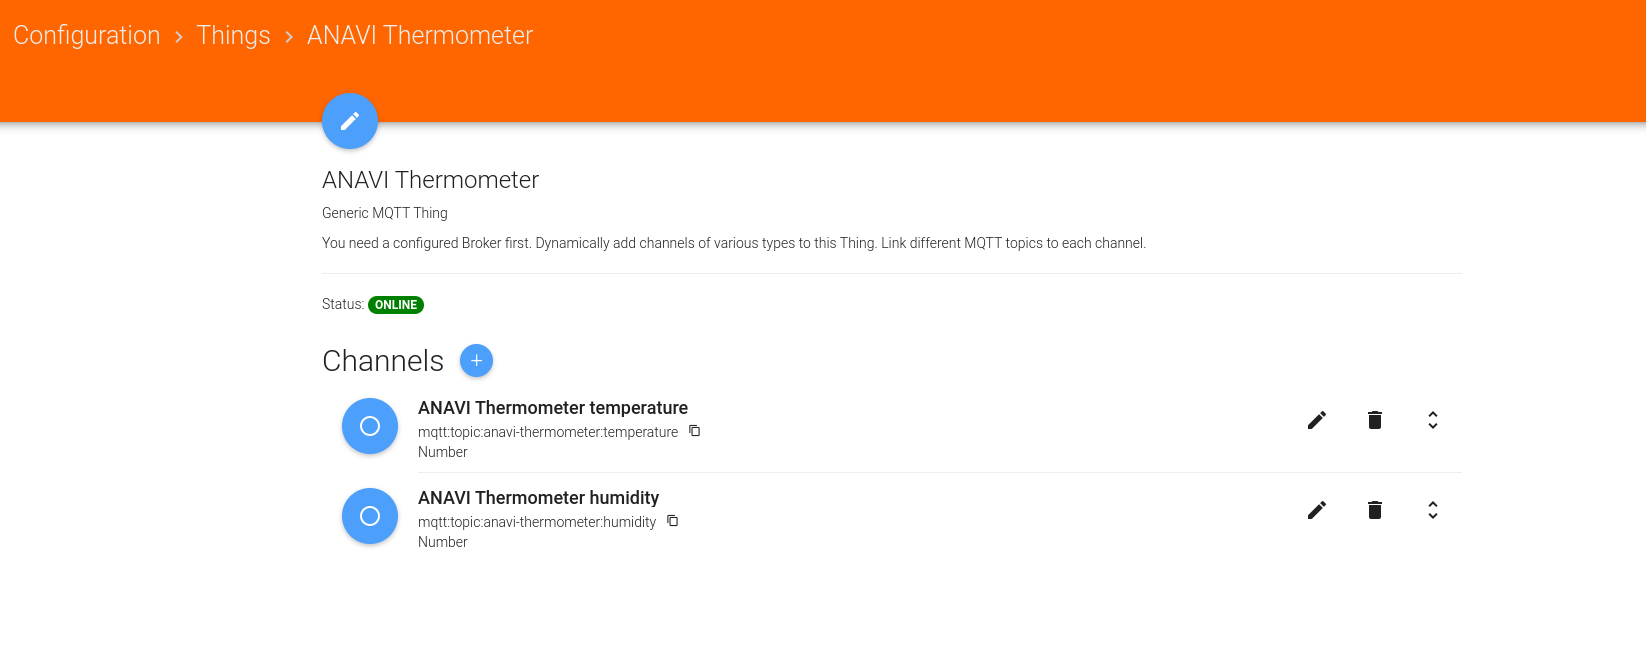
ANAVI Thermometer things and channels in Hestia Pi’s OpenHAB

I feel grateful for having found these two great open projects and being able to play with them, learn many things and having a feeling of accomplishment after customizing my own setup!

This is the last post on these ANAVI Thermometer series, but not the last from Hestia Pi… More hacking to come!
ANAVI Thermometer – HestiaPi integration

This integration works with HestiaPi Touch ONE v1.2

These changes need the HestiaPi Touch UI to be updated with my anavi-thermometer branch.

Add-ons

ANAVI Thermometer publishes values in JSON. They are easy parsed in OpenHAB with the JSONPath transformation add-on. We will need to install it first

Things and items

ANAVI Thermometer

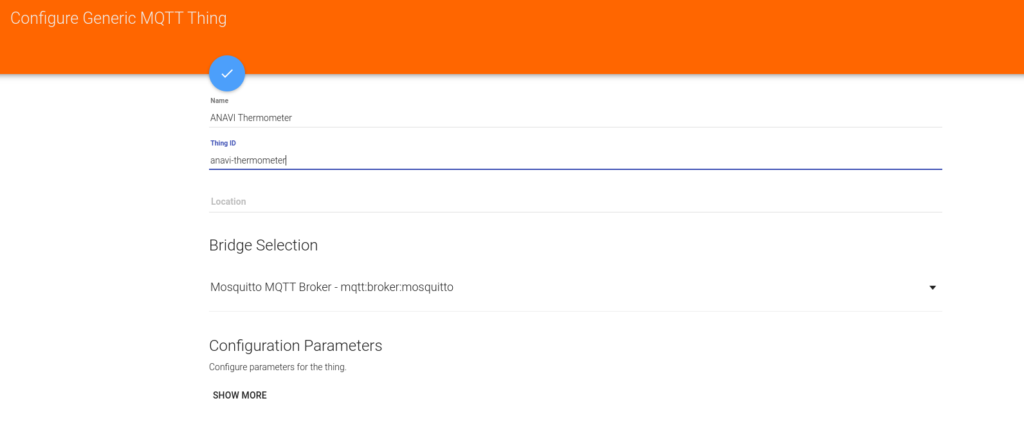
We create a separate Generic MQTT Thing for setting the channels related to ANAVI Thermometer values

Generic MQTT Thing configuration

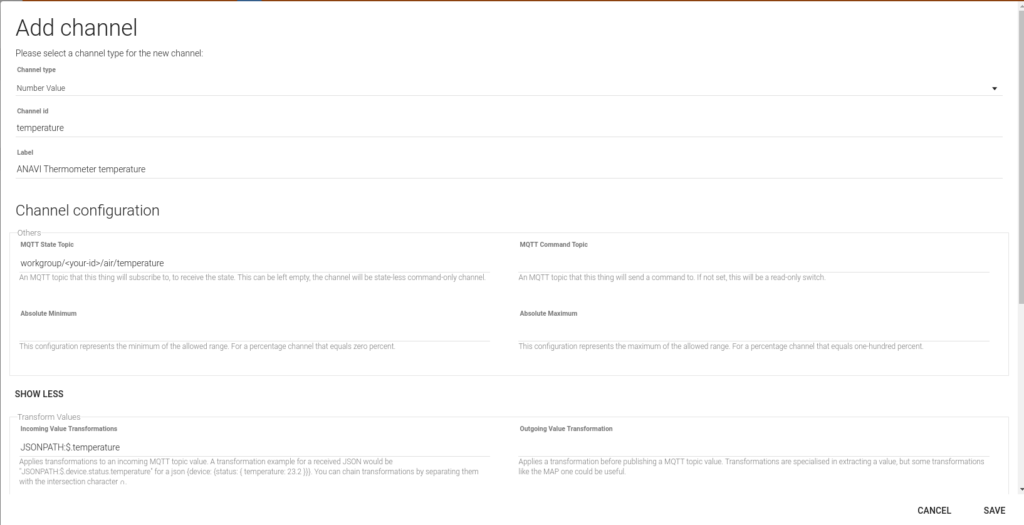
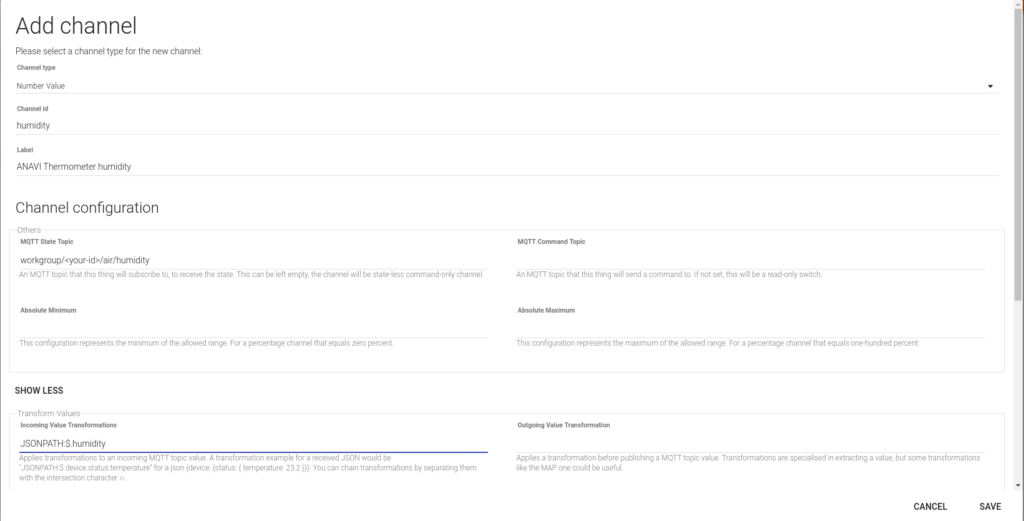
Then we create appropriate channels for ANAVI Thermometer’s temperature and humidity. They will probably be pushed to workgroup/<your id>/air/temperature and workgroup/<your id>/air/humidity MQTT paths. We use JSONPath for extracting actual values.

ANAVI Thermometer temperature channel
ANAVI Thermometer humidity channel
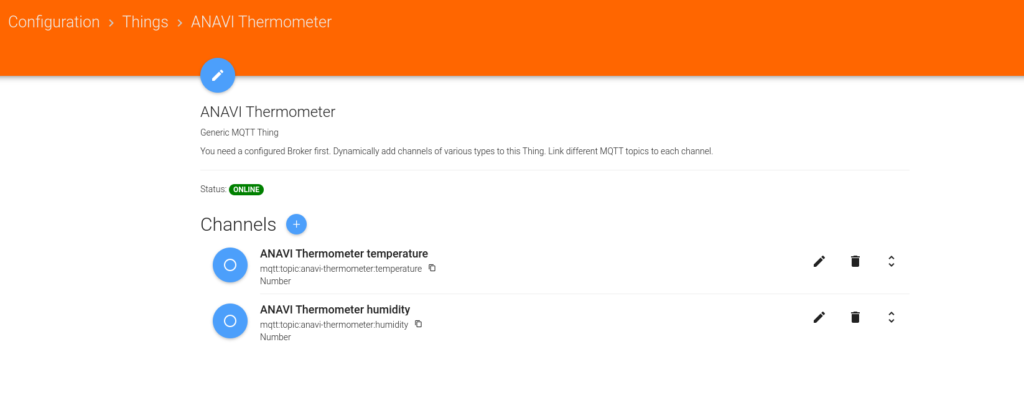
ANAVI Thermometer thing with channels

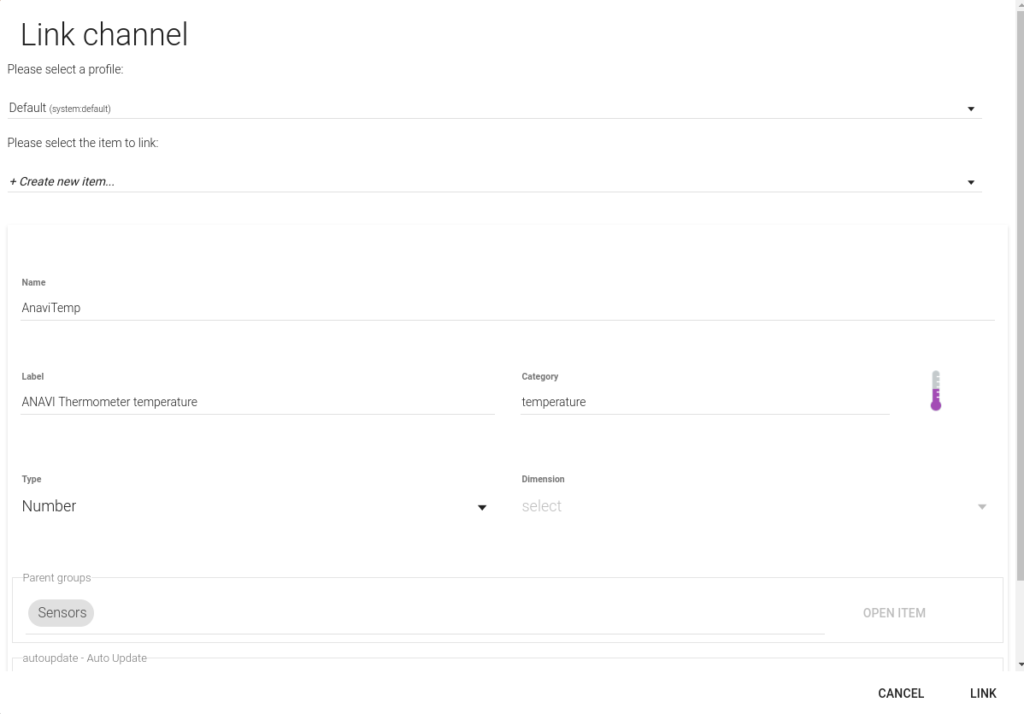
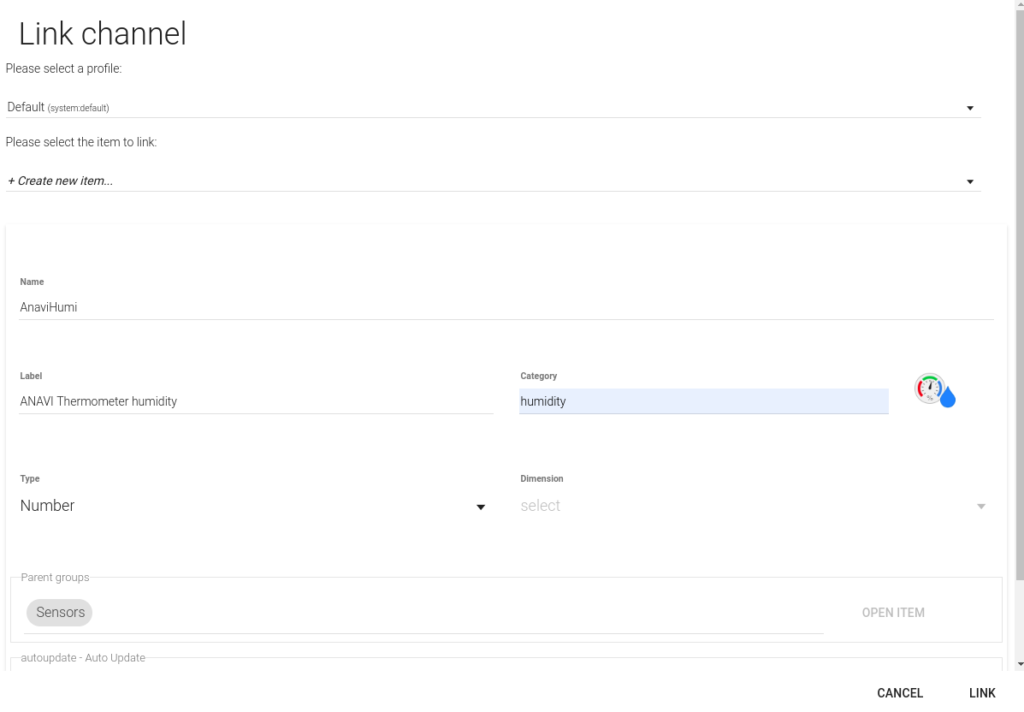
Finally, we need to link channels to their corresponding items. You can create them from the link channel, clicking at the arrows on the right

ANAVI Thermometer temperature item
ANAVI Thermometer humidity item

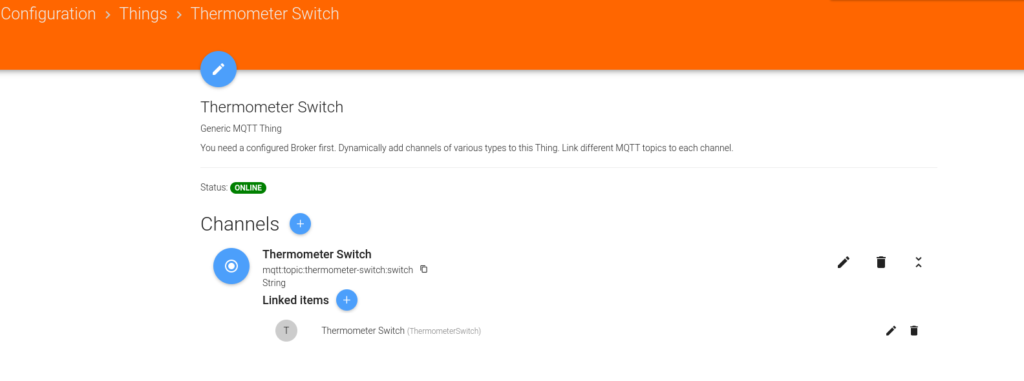
Thermometer Switch

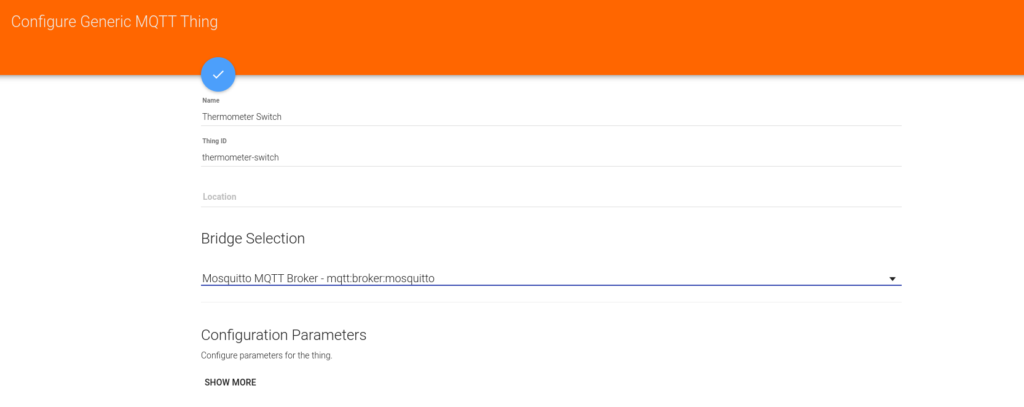
We create an extra MQTT thing, Thermometer Switch, that will be used for selecting which temperature the thermostat is following; based on this thing, HestiaPi will act on changes of the temperature sensor from HestiaPi or the one from ANAVI Thermometer

Thermometer Switch thing

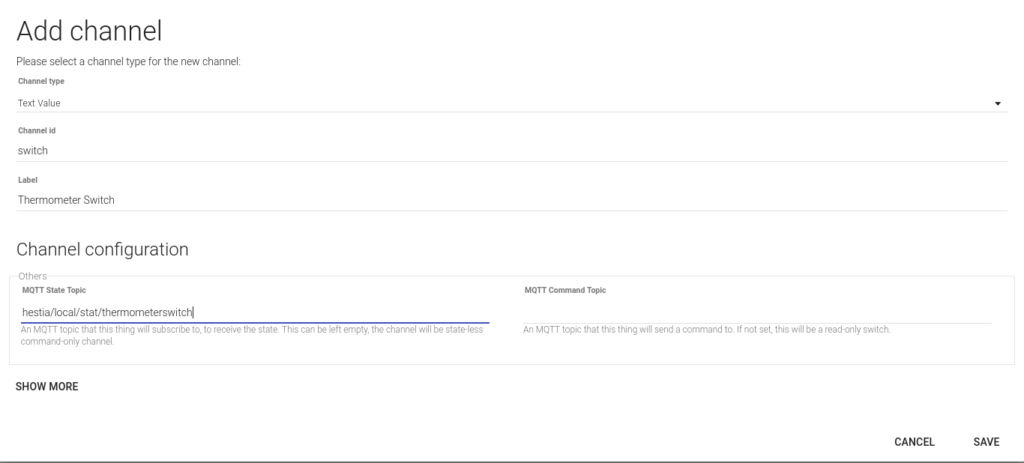
We need to create a new channel for this new thing. We will be reading its state from hestia/local/stat/thermometerswitch MQTT topic

Thermometer Switch channel

And finally, we create an item for this channel

Thermometer Switch channel with its linked item

Hestia Local Sensor Readings

A side effect of the Process Sensor Changes rule modification below is that the original MQTT channels used by HestiaPi to publish local sensor readings hestia/local/temperature and hestia/local/humidity will now publish ANAVI’s readings when Thermometer Switch has Anavi value. We will need to add two extra MQTT things and items to keep those local sensor readings. Former channels become current values the thermostat is considering for taking the decisions about turning on or off.

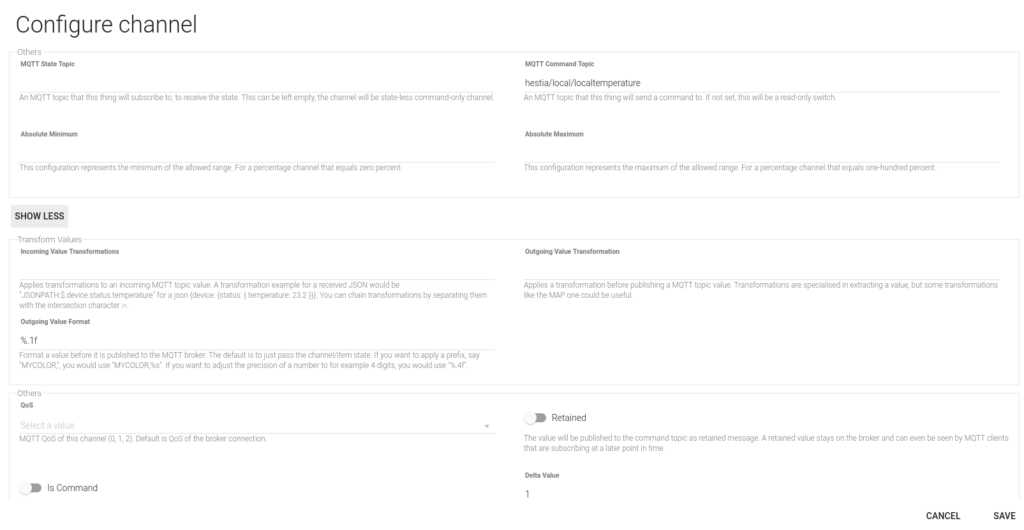
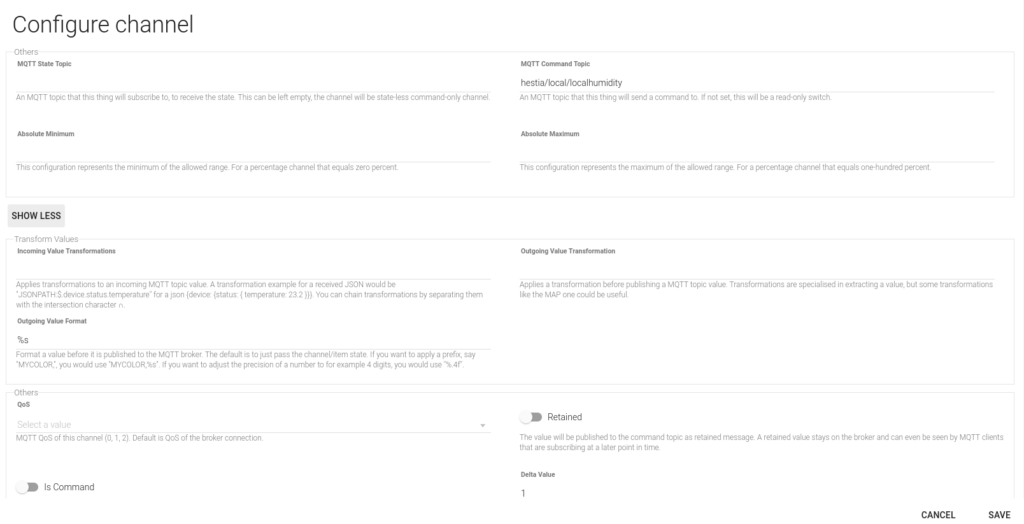
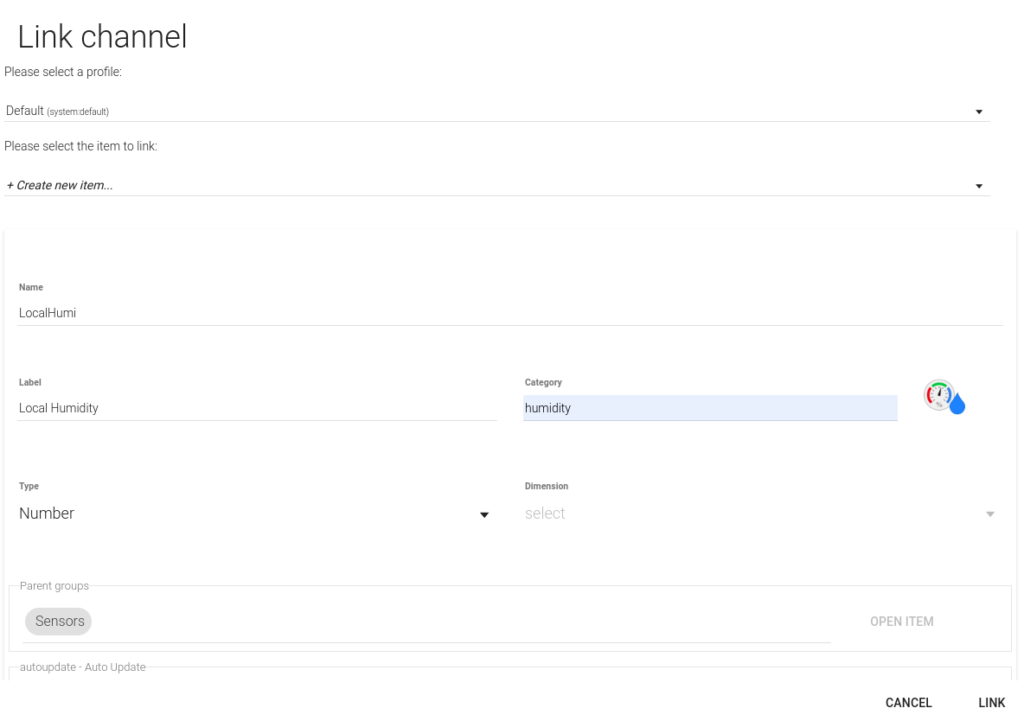
We add LocalTemp and LocalHumi MQTT channels pointing to hestia/local/localtemperature and hestia/local/localhumidity

LocalTemp channel
LocalHumi channel

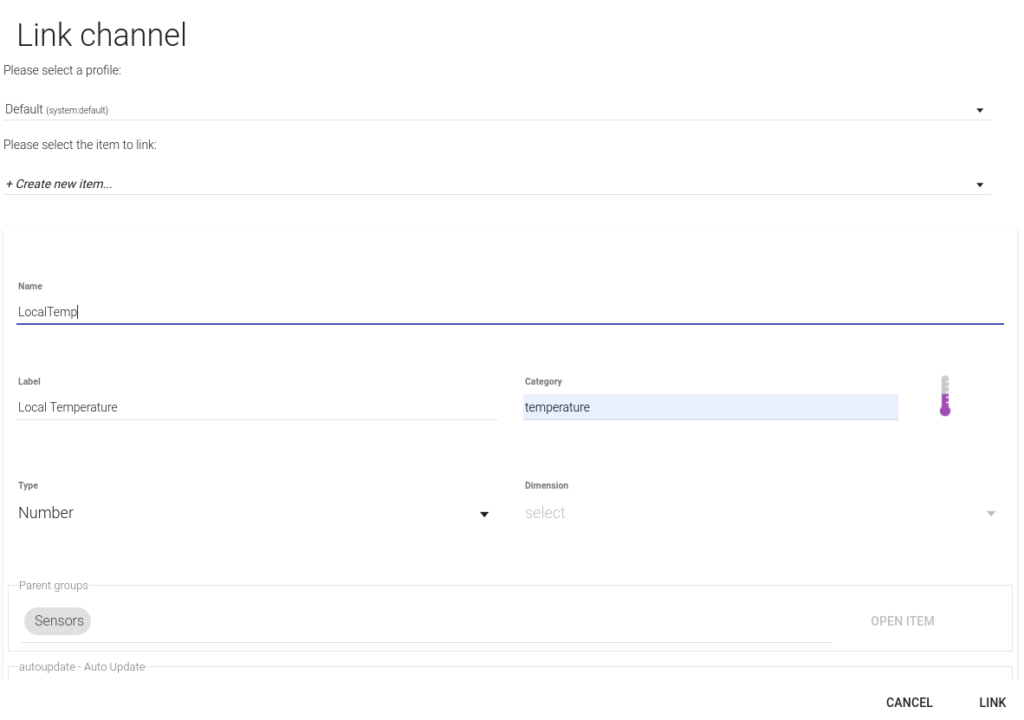
And we link these things to their corresponding items LocalTemp and LocalHumi

LocalTemp item
LocalHumi items

Rules

Initialization rule

We will need to add the initial value for Thermometer Switch, that will default to HestiaPi’s value My. This value is not very descriptive, but will match HestiaPi’s item names and will make things easier in the rules below.

initState("ThermometerSwitch", "My");

Process Sensor Changes rule

Process Sensor Changes is the rule that updates temperature, humidity and pressure proxies. It also decides whether to update temperature based on hysteresis changes.

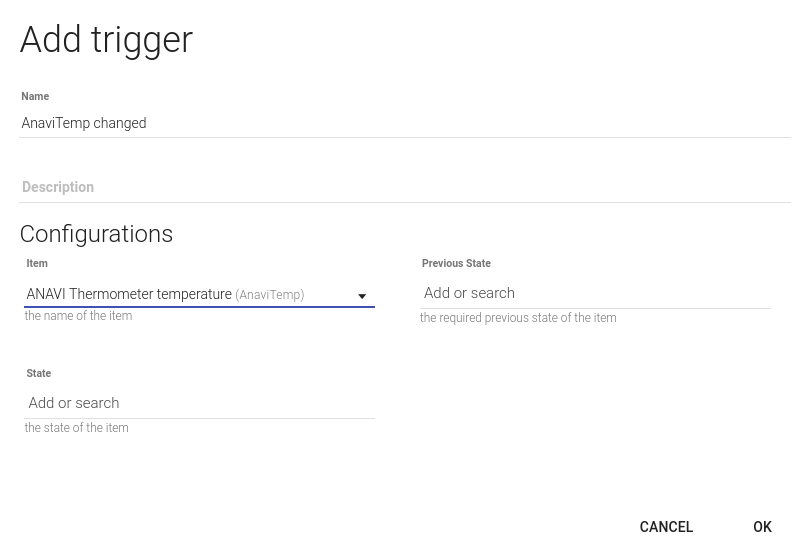
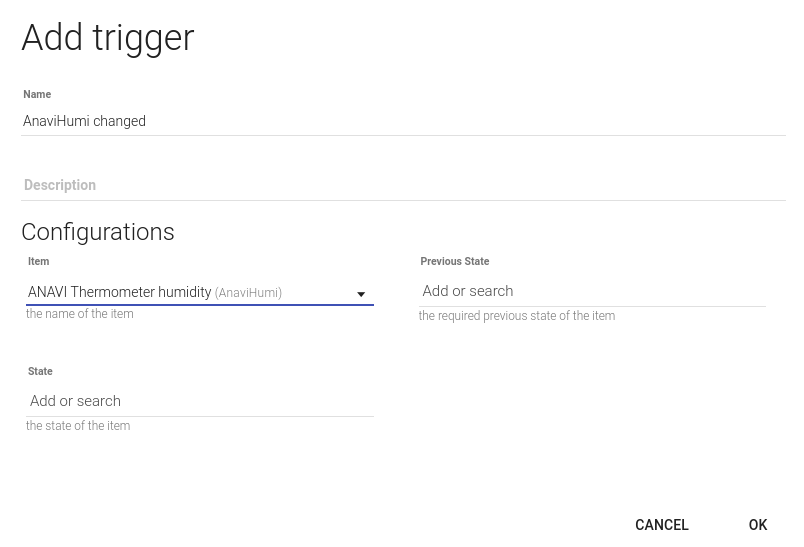
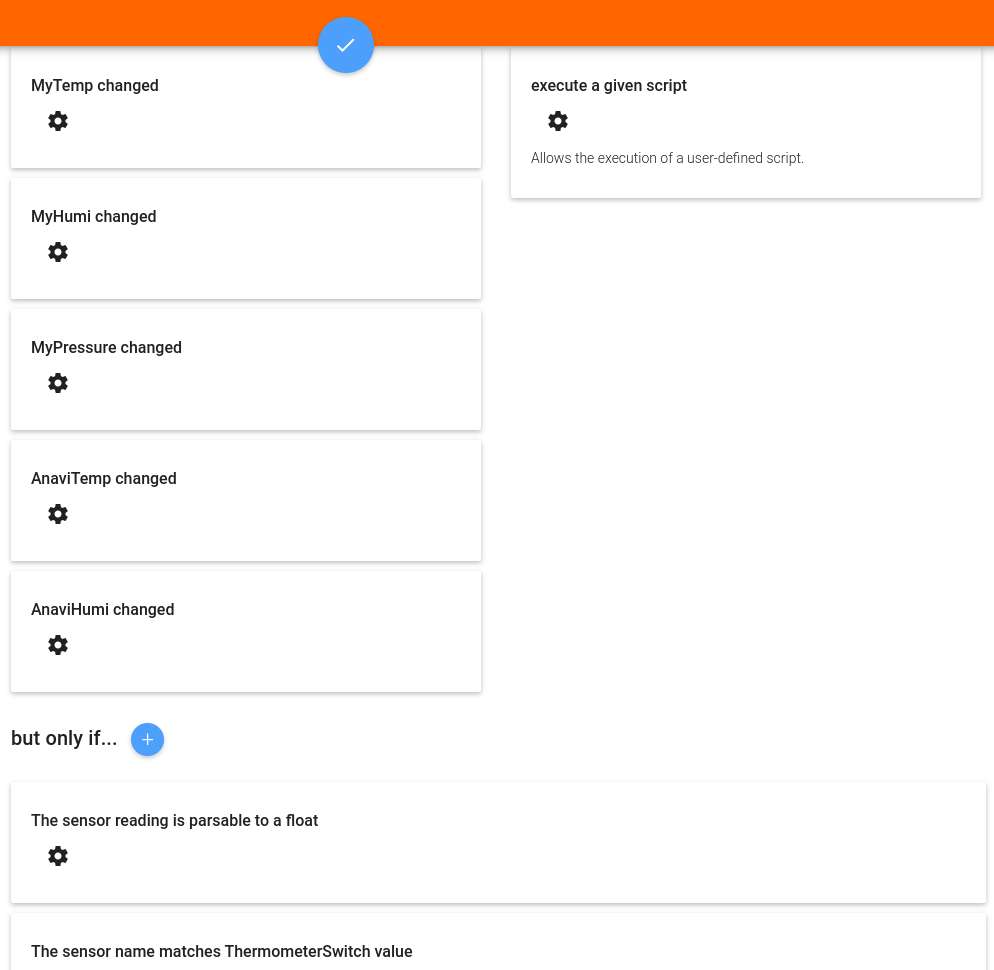
We add two new triggers so the rule is ran also whether AnaviTemp or AnaviHumi change

AnaviTemp trigger for Process Sensor Changes rule
AnaviHumi trigger for Process Sensor Changes rule

However, we need an extra condition: we set the constraint that the sensor that changed has to match the value of ThermometerSwitch, that is, only update values from HestiaPi’s sensor when My is selected in ThermometerSwitch, and only update values from ANAVI’s sensors when Anavi is selected

event.itemName.indexOf(items["ThermometerSwitch"]) == 0 || event.itemName == "MyPressure"

Finally, we slightly modify the rule to get the value from the relevant sensor, that can have My or Anavi prefix now

var OPENHAB_CONF = Java.type('java.lang.System').getenv('OPENHAB_CONF');
load(OPENHAB_CONF + '/automation/lib/hestia/utils.js');
load(OPENHAB_CONF + '/automation/lib/hestia/defaults.js');

var device;
var logName = "sensor";

logDebug(logName, "Changed "+event.itemName);

if (event.itemName == 'MyPressure') {
  device = 'Pressure'
} else {
  device = event.itemName.replace(items["ThermometerSwitch"], "");
}

// Update the proxy
events.sendCommand("My"+device+"Proxy", newState);

// Verifying the newState can be parsed is already checked in the but only if…
var newReading = parseFloat(newState.toString());

var prev = items["Previous"+device+"Reading"].floatValue();
if(prev == NaN) prev = 0;

var hyst = (device == "Temp") ? DEFAULTS.get("Temp"+items["TempUnit"]+"_DIFF") : DEFAULTS.get(device+"_DIFF");

logDebug(logName, "Processing " + device + " with value " + newState + " and prevState " + prev + " and delta " + delta);

var delta = Math.abs(newReading - prev);
if(delta > hyst) {
  logDebug(logName, "Updating Previous"+device+"Reading with " + newState);
  events.postUpdate("Previous"+device+"Reading", newState);
}
else {
  logDebug(logName, "Ignoring " + device + " sensor reading, change is too small");
}
Modified Process Sensor Changes rule

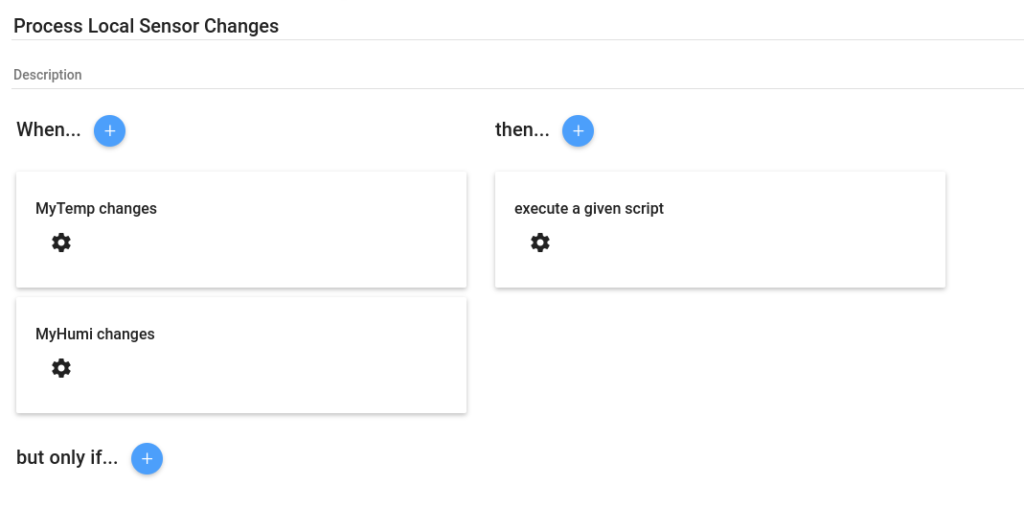
Process Local Sensor Changes rule

Finally, we add an extra rule to publish HestiaPi’s sensor values to the extra MQTT things LocalTemp and LocalHumi that we created before

They will be triggered when MyTemp or MyHumi change

var OPENHAB_CONF = Java.type('java.lang.System').getenv('OPENHAB_CONF');
load(OPENHAB_CONF + '/automation/lib/hestia/utils.js');
load(OPENHAB_CONF + '/automation/lib/hestia/defaults.js');

var logName = "localsensor";

logDebug(logName, "Changed "+event.itemName);

var device = event.itemName.replace("My", "");

// Update the proxy
events.sendCommand("Local"+device, newState);

Open Bedroom Thermometer: Light detection and screen fade

One of my main concerns about placing a new display in the bedroom was light contamination. The same rule applies both to clean interfaces and when going to sleep: no distractions. Luckily, handling the screen brightness of my ANAVI Thermometer was easier and more straightforward than I imagined

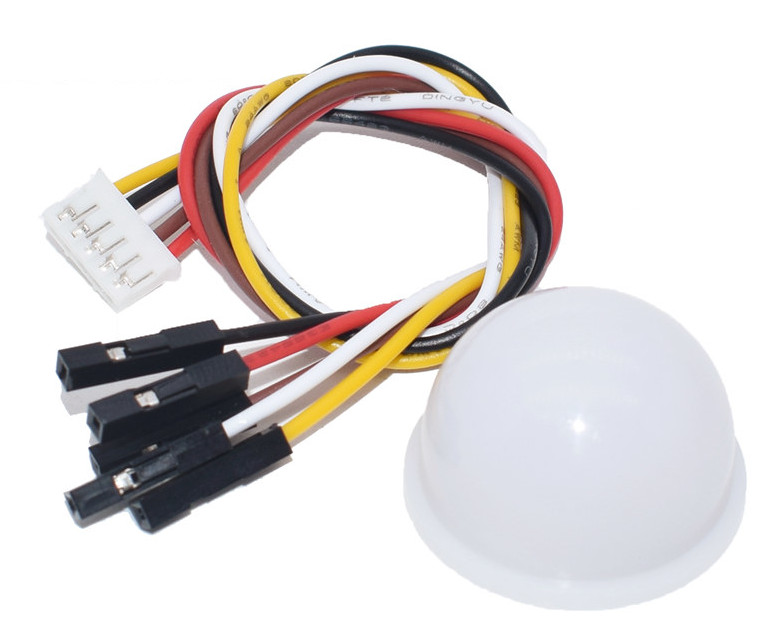
The first step was getting a light detector, so we can discern when the room goes dark. I just noticed the BH1750 light sensor is recommended in ANAVI’s web. And, as I mentioned about my surprise on the availability of cheap components, I could find it easily and very cheap.

BH1750 light sensor

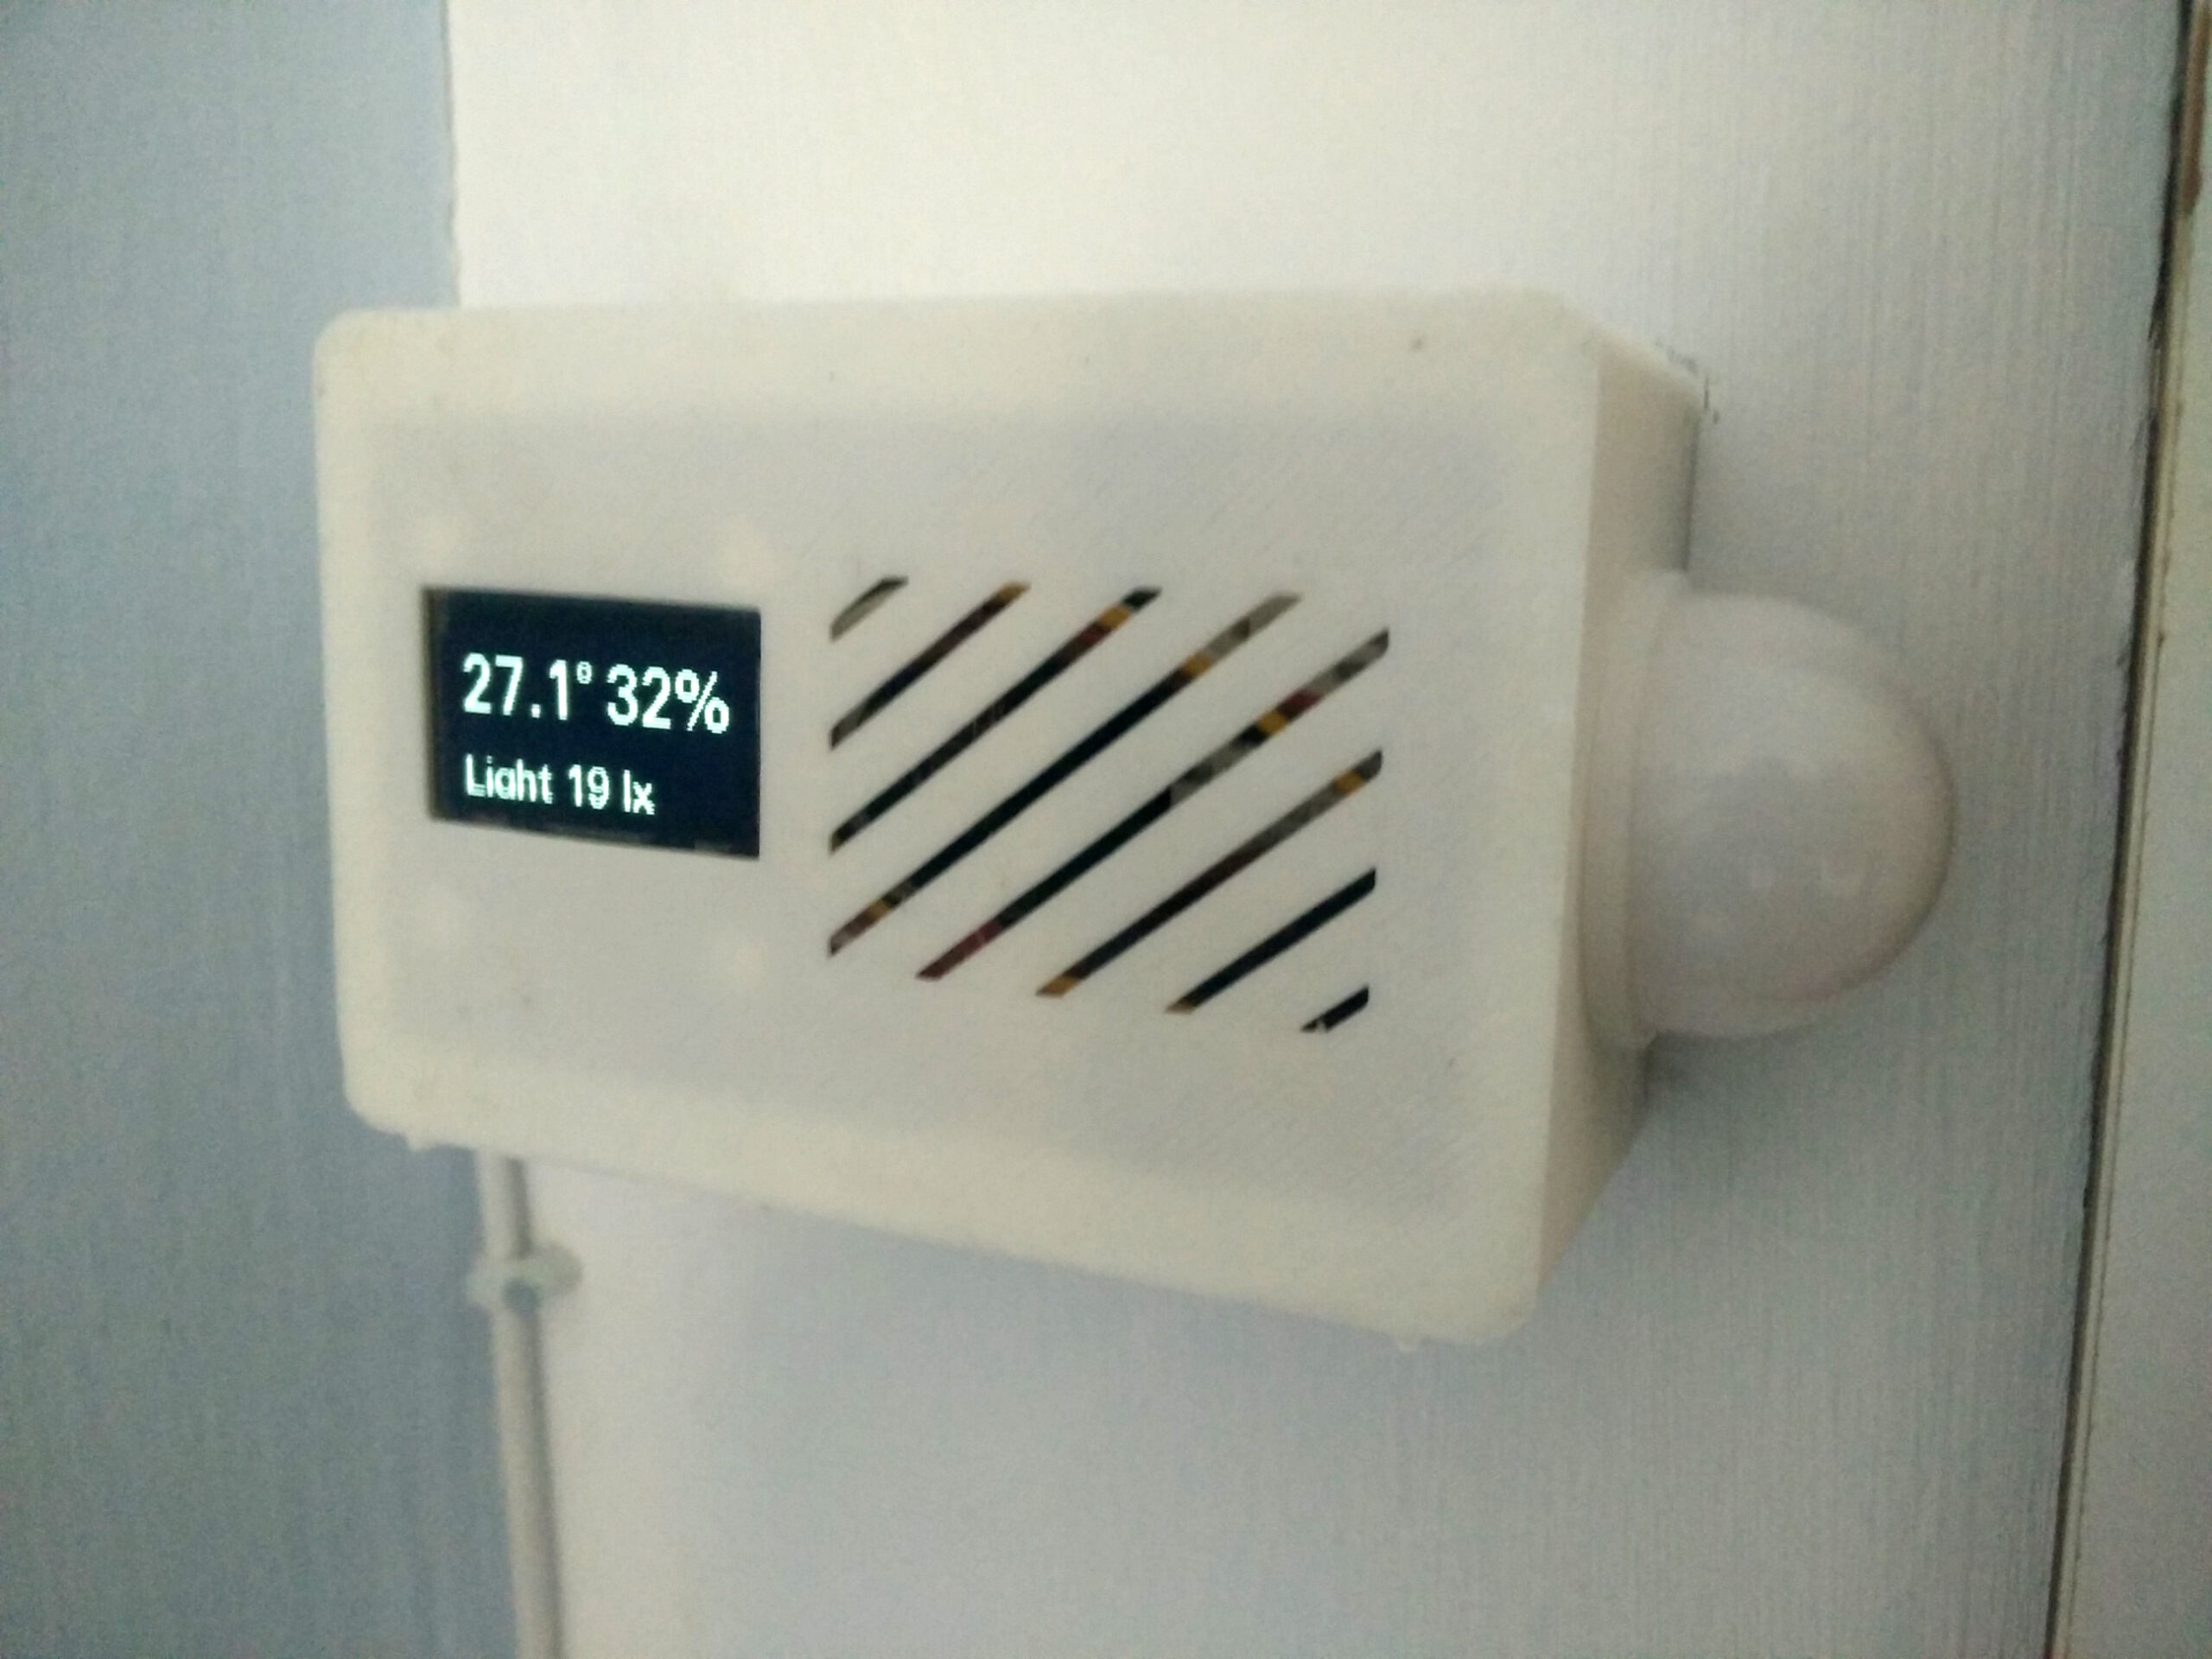
Plugging it into my ANAVI Thermometer couldn’t be more straightforward. Leon’s firmware is prepared to detect it and include the readings both in the OLED display and in its own MQTT topic.

Adding it to the thermometer case was surprisingly easy as well. The case I 3D printed already had a slot in one side that I could file down a bit. The light detector bulb just made a perfect fit!

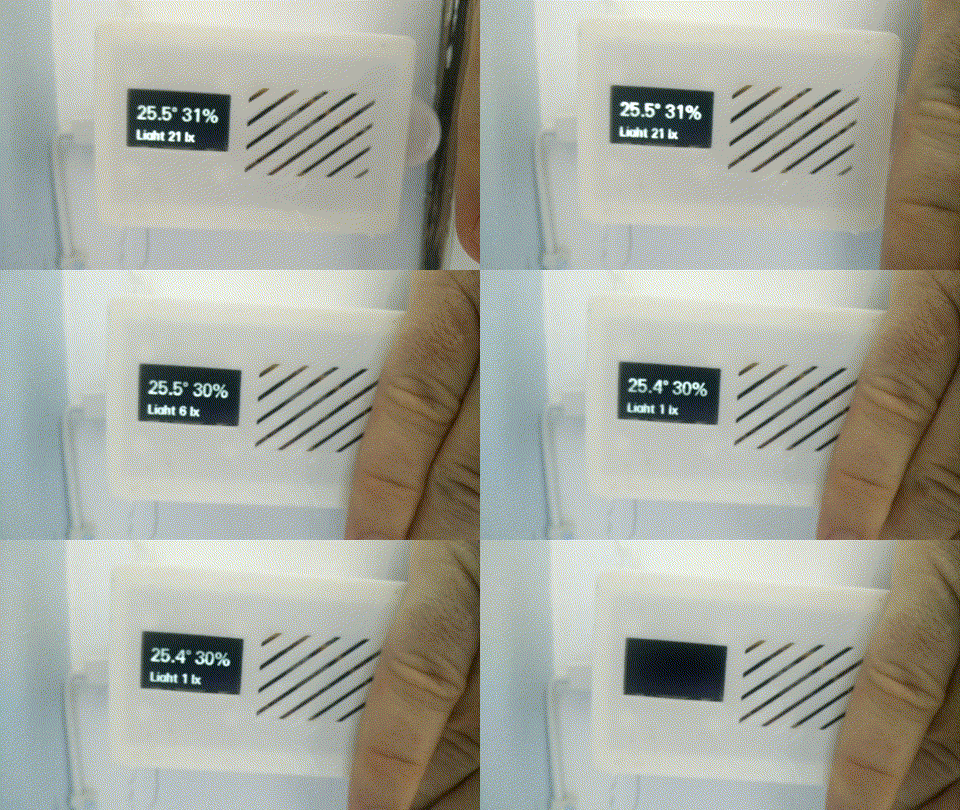
And finally, there was the job of adapting ANAVI Thermometer’s firmware to program the display fade according to the light detected in the room. Arduino’s libraries like U8g2 already come with a setContrast API call to reduce the screen light. But it is not enough. Luckily, there is a thread on Arduino’s forum on how you can also play with the OLED display precharge registry to reduce the brightness even more. I had to do some calibration work, trying several values with both the smaller and the right-size OLED displays. Behavior with different values might vary a lot, but I found a setup where I can do a decent fade out depending on the values measured by the light detector.

Finally, using the U8g2 setPowerSave call, I turn off the display when there is no light.

You can find all these changes to in my screen-fade branch of ANAVI’s Thermometer firmware.

And this way we get a quiet environment for sleeping!

ANAVI Thermometer’s screen fades with the room light

Open Bedroom Thermometer: Aesthetic Customization

I am pretty happy with my University education. I studied Telecommunications Engineering in Spain, which is a mix of Computer Science, Electrical Engineering and Telecommunication Systems. I think it gave me a solid base for a broad range of topics, from the signals inside a circuit to software engineering principles.

However, something I have missed is some basic formation on UX and design. I think it would have helped me a lot in many of my projects. Along the years, I have valued the importance of these aspects in a project: you might have the most wonderful technical implementation of something but, I you can’t let your users understand it, you will fail.

Suitable case

The first part obvious for placing my ANAVI Thermometer in the bedroom is that it needed a case. Dust protection, protection from humans, aesthetics. ANAVI’s setup is quite convenient for development, but not as suitable for a product that is going the take part of the decoration of your bedroom.

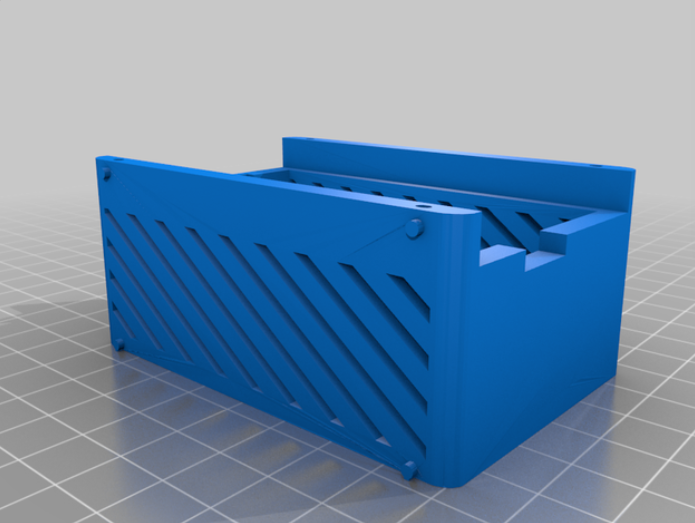
Vented Box – Anavi Thermometer in Thingiverse

Luckily, one of the Crowdsupply field reports on ANAVI Thermometer included a printing model for a case. I hadn’t a 3D printer yet, so I ordered it to be printed using one of the apps plugged into Thingiverse, and I got a mail package with my case ready to be placed. Cool!

Matching display

A white on black OLED display was more suited for this set than the yellow and blue that came from Anavi Technology. However, when the new display arrived, I discovered it had different dimensions. It didn’t fit in the 3D printed case.

OLED display

I didn’t want to order a new copy of the case. So I did an endless search for a display with the same dimensions than ANAVI’s. It was hard to find one. Finally, I found this 0.96 inch display from AZDelivery that was a perfect fit

Display reshape

I apply UX and design principles in my work, not only in product development, but also in the interfaces or the user experience of a command tool. I think the hardest but more beautiful job is making the complexity simple. I praise Apple for this. Despite I would never buy one of their products, I can admit the value and experience they used to deliver in each of them.

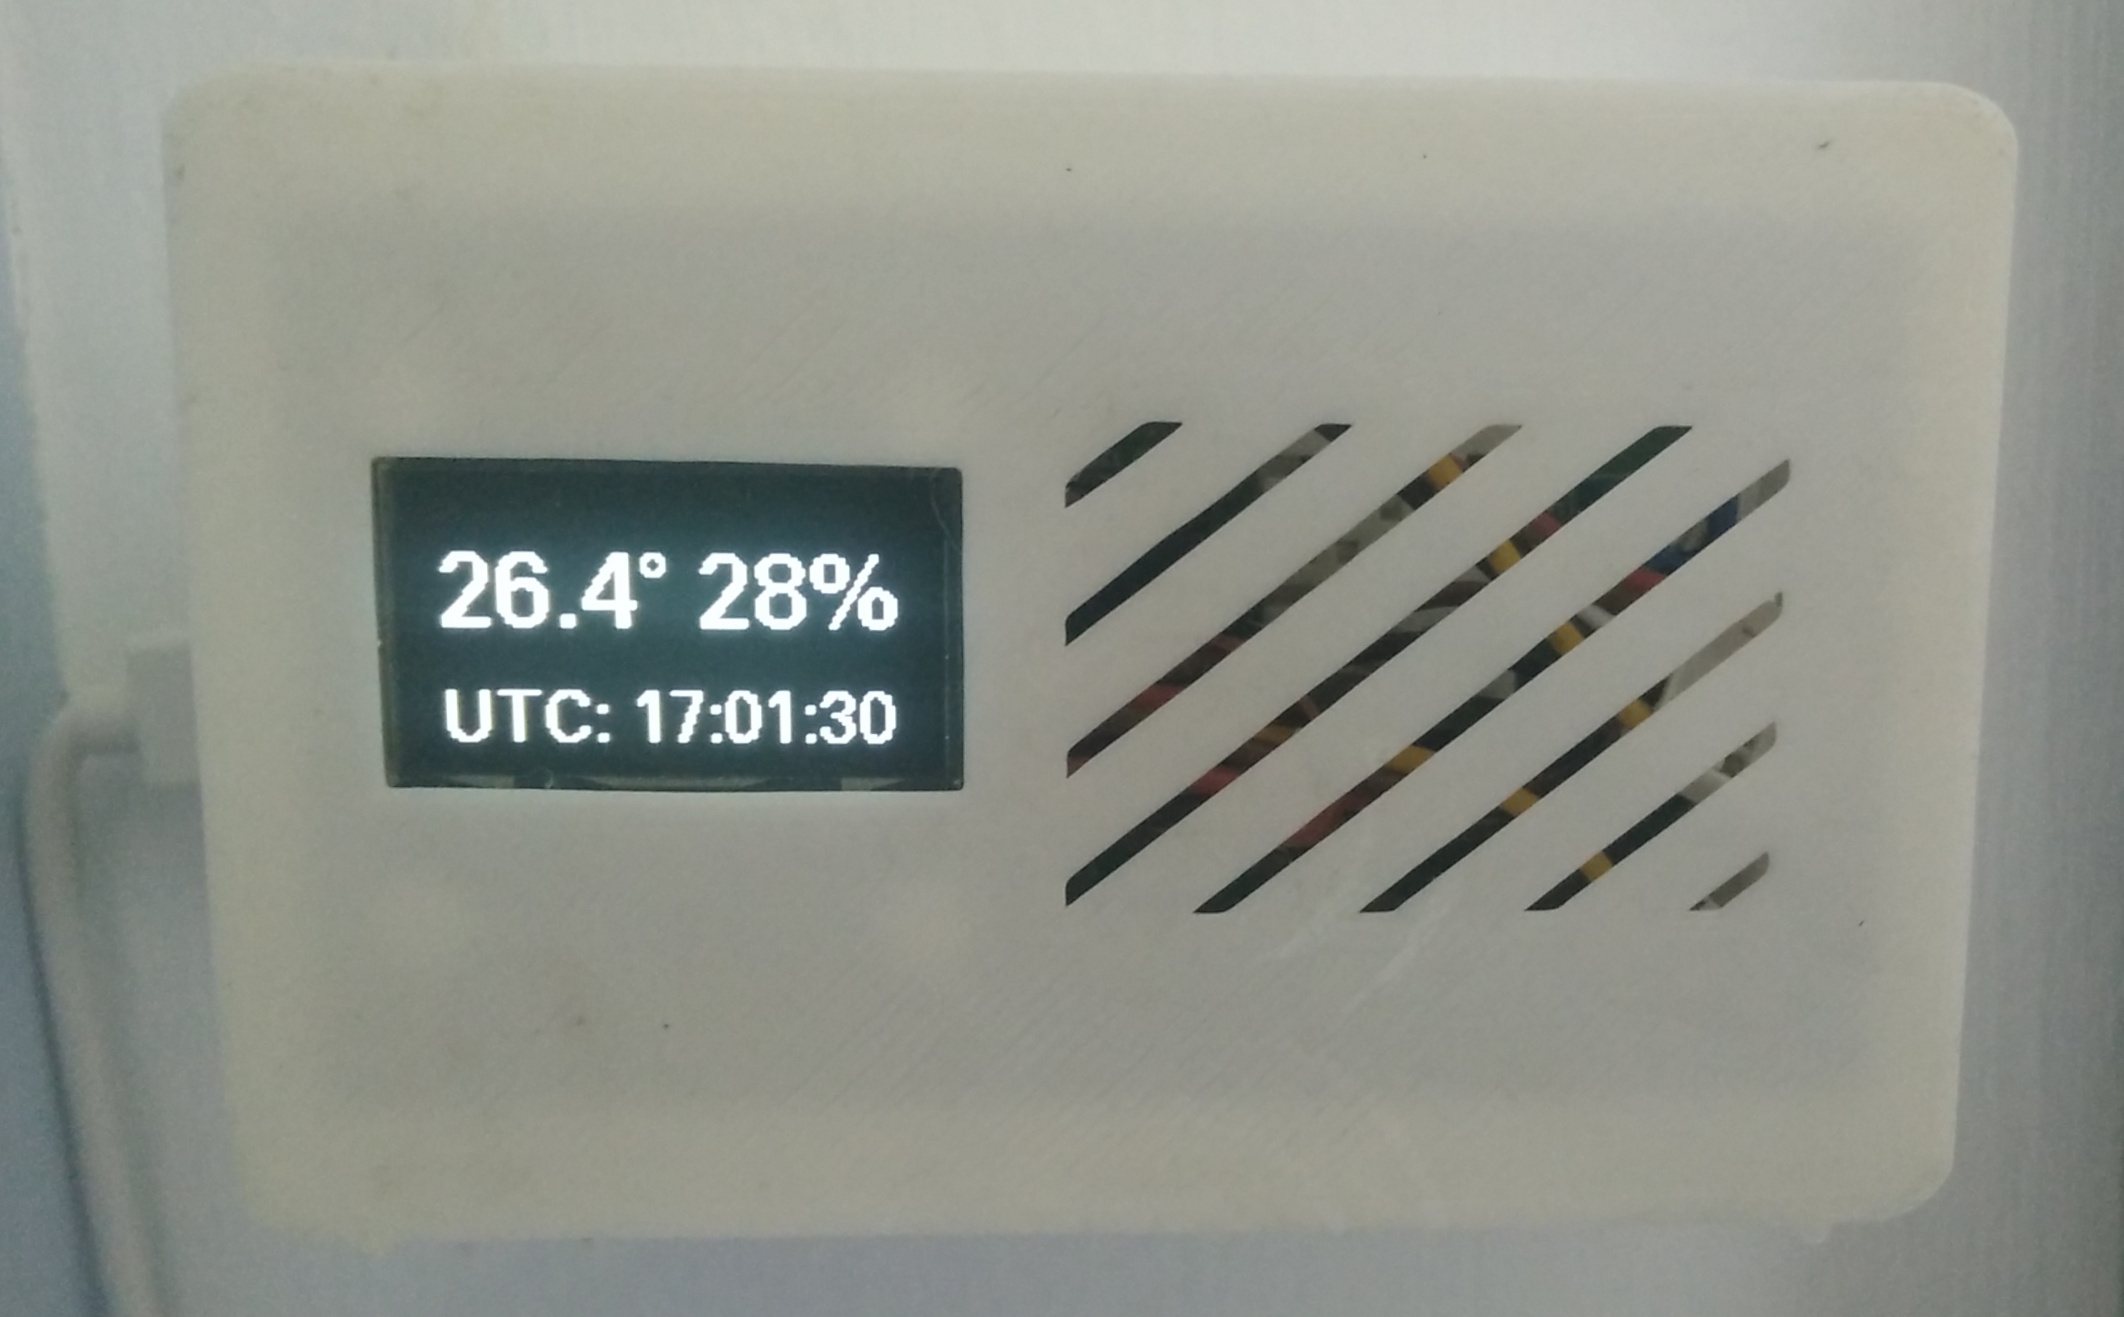
There were obvious things to cut in the original display information. Leon has done a great job creating a software that works for a lot of purposes (as we will see in the next article on the light sensor). But I am not plugging a water temperature sensor, so the Air word is not needed. The temperature unit as well, we just use Celsius. And also Humidity word, the % sign is just enough

These cuts allows increasing the font size and placing the figures in one row. I also prefer a sans-serif font, which I chose from the amazing U8g2 library.

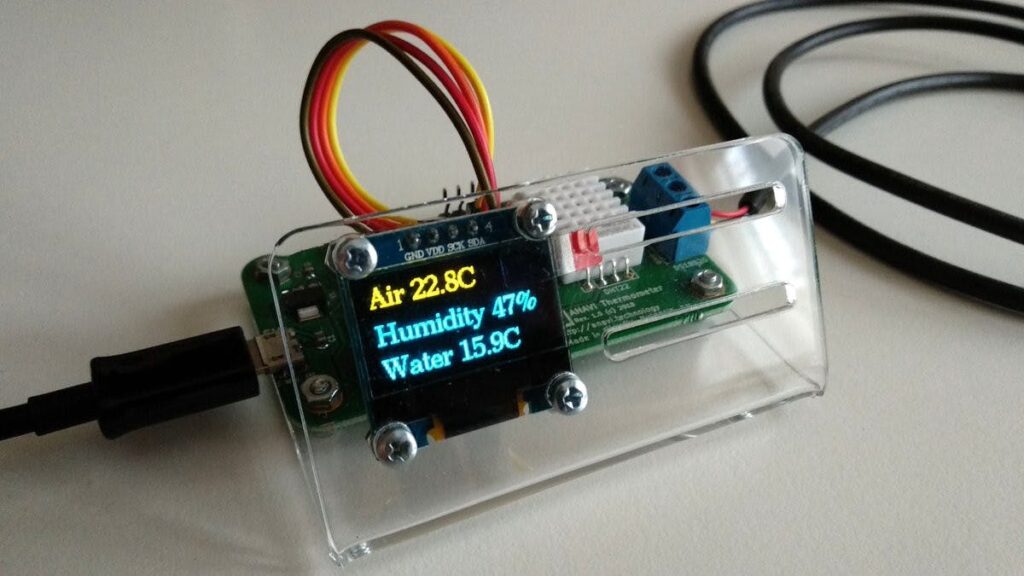
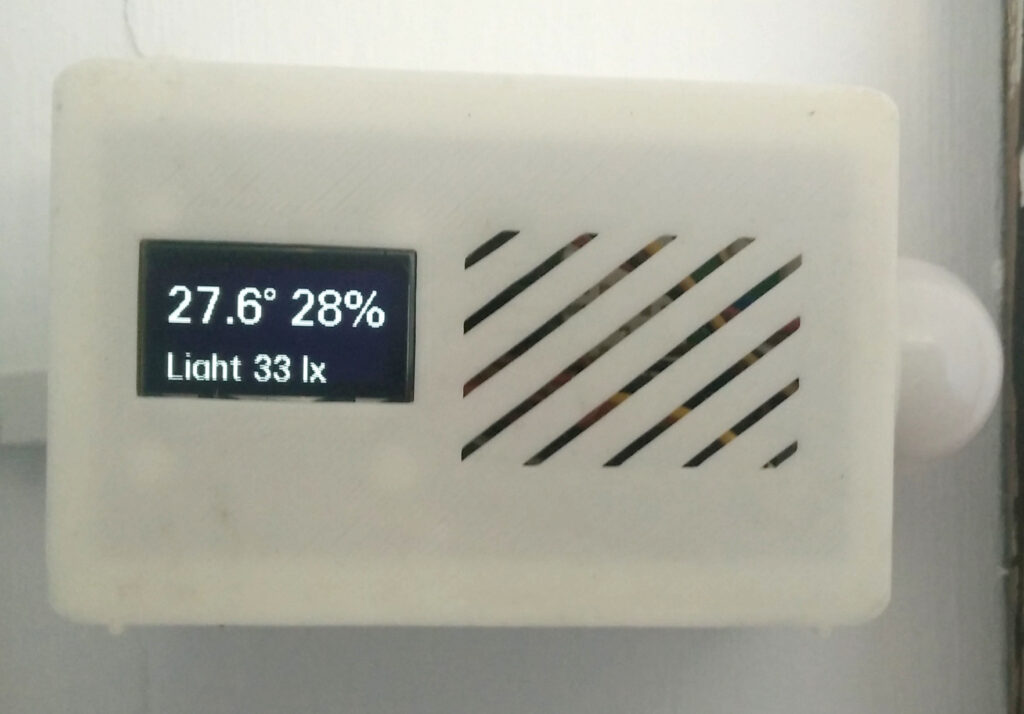
ANAVI’s default display vs customized display

I have published all the changes in display customization. You can find them in the display-reshape branch of my fork of ANAVI Thermometer firmware.

Open Bedroom Thermometer

Open Bedroom Thermometer

After setting up the mighty open source and open hardware Hestia PI in the living room, an extra thermometer in the bedroom was the next step. Hestia PI‘s does its job amazingly well during the day. But when the night comes, we don’t care about the temperature in the living room, but in the bedroom. We have only one central heating, the bedroom temperature is the one that should drive during the night.

In the spirit of my requirements, I found an amazing project that filled my expectations: ANAVI Thermometer.

Leon Anavi is a open hardware enthusiast from Bulgaria that creates awesome open hardware and open software projects. His products are open hardware certified. He has infrared transmitters, gas detectors, fume extractors… And, of course, a thermometer.

ANAVI Thermometer
ANAVI Thermometer with its original kit. Source: Anavi Tecnology

I purchased one from Crowdsupply. But I didn’t just placed it. I wanted to make some customizations to fulfill my needs and make it look more like an end user product! So I made the following changes:

The final result in its placement looks great!

Debugging in Kweb

I have been recently hacking on HestiaPi‘s interface, so I could add the measures from ANAVI Thermometer to HestiaPi‘s interface. When I first tried to deploy the last version of the interface, it didn’t work

It looked like a Javascript error, so I tried to see what was going on in Kweb, the browser that runs hestia-touch-one-ui, HestiaPi‘s interface. Kweb is a minimal kiosk browser. It is perfect for RaspberryPi, where resources are limited (HestiaPi runs in a RaspberriPi Zero)

I could open a new console exporting the X window system ssh -Y hestiapi, and fire up Kweb. However, Kweb interface does not comes with a Javascript console like the ones web developers are used to

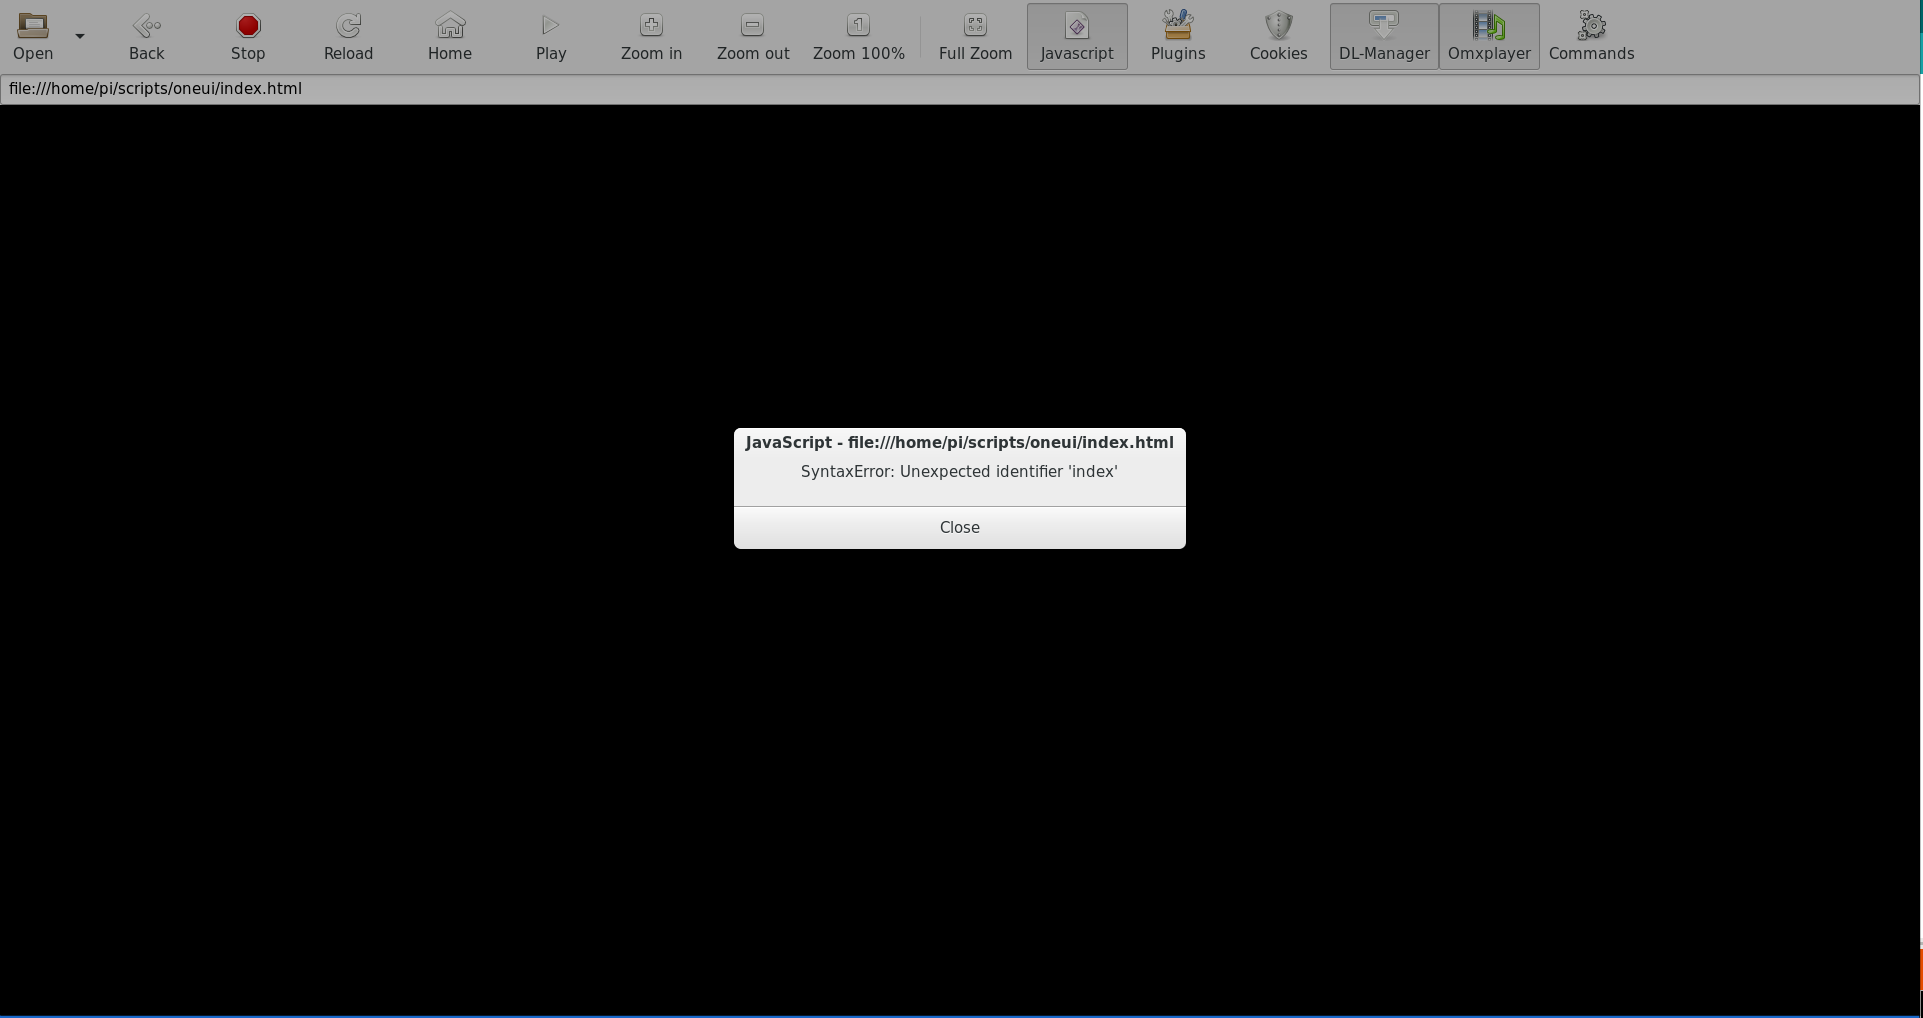
But I could use a trick to find out what it was going on. I added a callback to window.onerror event so I could show the errors through alert

<script>window.onerror = function(msg, url, lineNo, columnNo, error) { alert(msg); alert(url); alert(lineNo); alert(columnNo); alert(error); }</script>

It was quite tricky but it did the job. I could find out that the building process was not traspiling ES6 let, happily fix the issue and deploy my bright new with bedroom measures from ANAVI Thermometer in HestiaPi!